This guide explains how to fix Windows spotlight not working in Windows 10 PC and how to save Windows spotlight lock screen images to use them as wallpapers
Windows Phone is the third best mobile operating system which is available out there. There are a lot of smartphones which run on Windows Phone OS and are increasing day by day. One of the cool features which you get in Windows Phone is Bing lock screen wallpaper. With this feature the lock screen of your Windows phone will refresh automatically each day. If you are using Windows 10 operating system, you might be aware of something similar as this feature is called “Windows spotlight” in Windows 10.
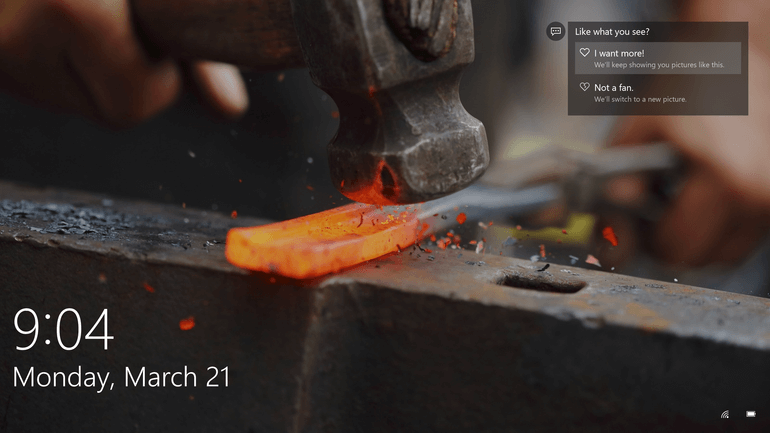
Windows spotlight is a great feature in Windows 10 and you will find it in all the latest versions of Windows operating system. There are plenty of complaints by users regarding Windows spotlight on various Windows 10 forums and if you are also experiencing Windows spotlight not working properly on your computer then you are at the right place as today we are going to tell you how to fix windows spotlight not working in Windows 10.
But before we share the methods to fix windows spotlight not working issue, let’s find out what is Windows Spotlight feature in Windows 10 operating system? Here we go.
You may also be interested in checking out:
- Service registration is missing or corrupt Windows 10 Fix
- How to Fix “Server execution failed” Error in Windows 10
- How to Fix “Page Fault in Nonpaged Area” Error in Windows 10
- How to Fix “The DNS server isn’t responding” in Windows 10 / 8 / 7
- How to Fix COM Surrogate has stopped working in Windows 10
What is Windows Spotlight Feature in Windows 10?
With the help of Windows spotlight feature, you will be able to see different and fresh backgrounds on the lock screen of your Windows 10 computer. In simple words, Windows spotlight is an option for the lock screen background in Windows 10 that displays different background images on the lock screen.
Windows spotlight feature is available on different versions of latest Windows 10 operating system such as Windows 10 Pro, Windows 10 Education and Windows 10 Enterprise etc.
How to Fix “Windows spotlight not working” in Windows 10
If you are experiencing Windows spotlight not working issue on your Windows 10 PC, you can have a look at these two methods which we are going to share in this guide. These both methods will perfectly help you in solving Windows spotlight not working issue on your Windows 10 computer.
Method 1: Using File Explorer
This is the first method which will help you to fix Windows spotlight not working in Windows 10. We are going to take help of File Explorer in order to fix this issue on our Windows 10 computer.
Step (1): First of all, you have to disable Windows spotlight feature from the settings app of our computer. To do this, go to Settings > Personalization > Lock screen > Background > Windows spotlight > Picture / Slideshow option.
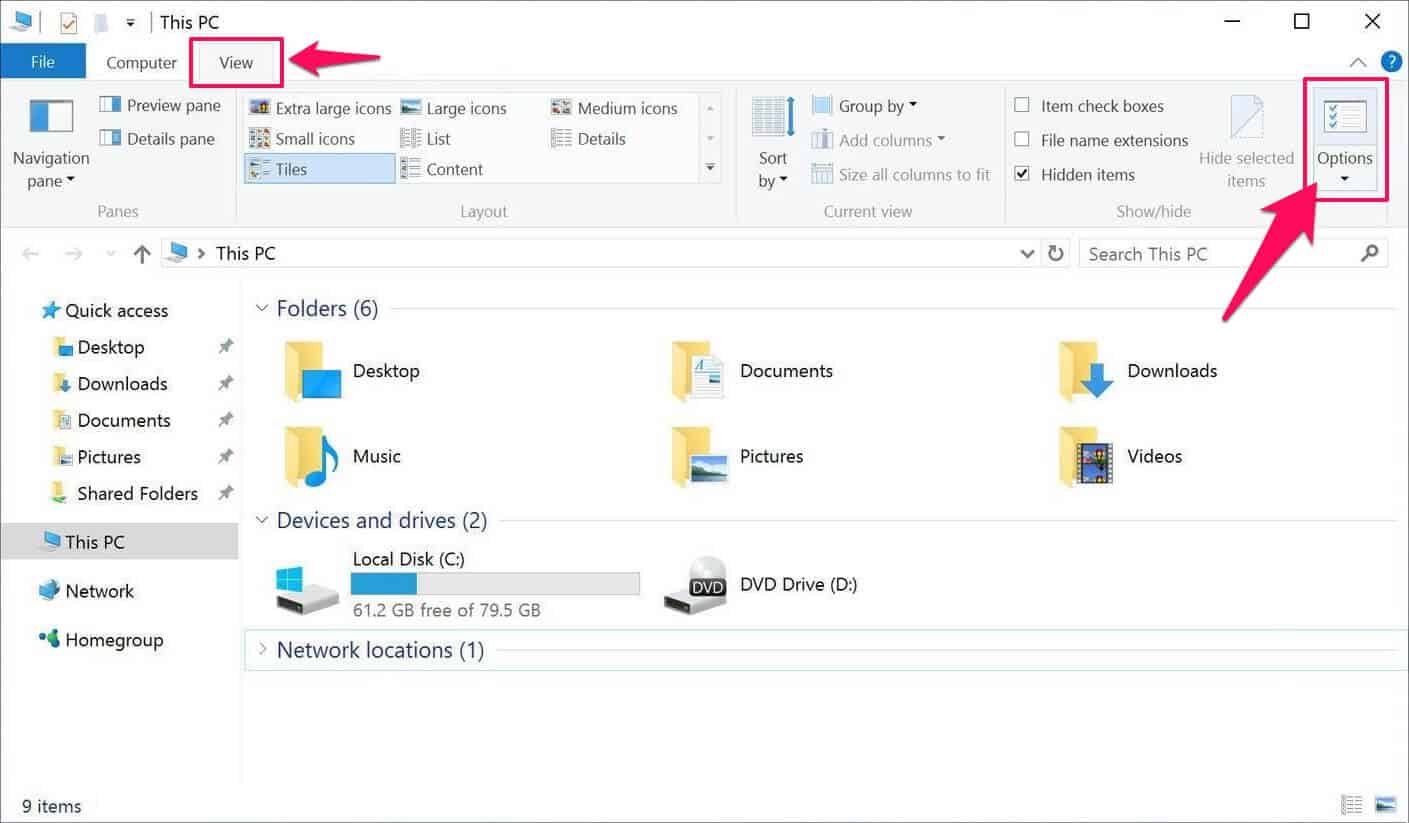
Step (2): Next you have to press combination of Win + E key which will open File Explorer on your computer. Open View tab and then click on Options.
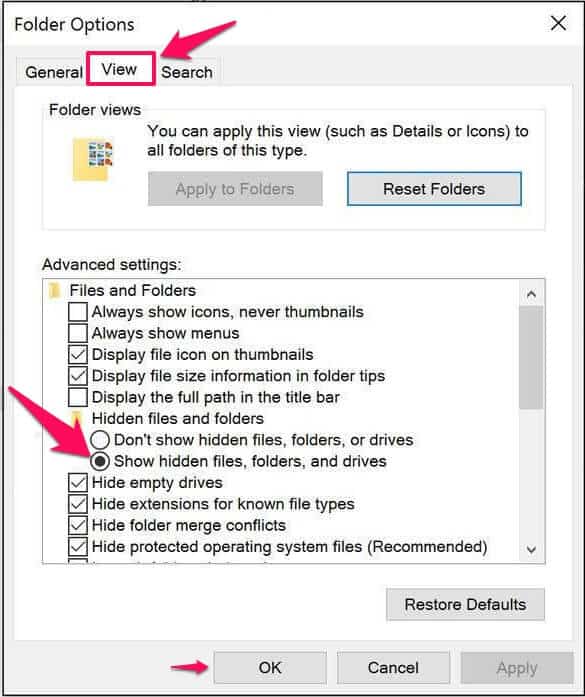
Step (3): In the Folder Options window, select the View tab and then from the Advanced Settings list, select Show hidden files, folders, and drives option.
Step (4): Now you have to open the following directory:
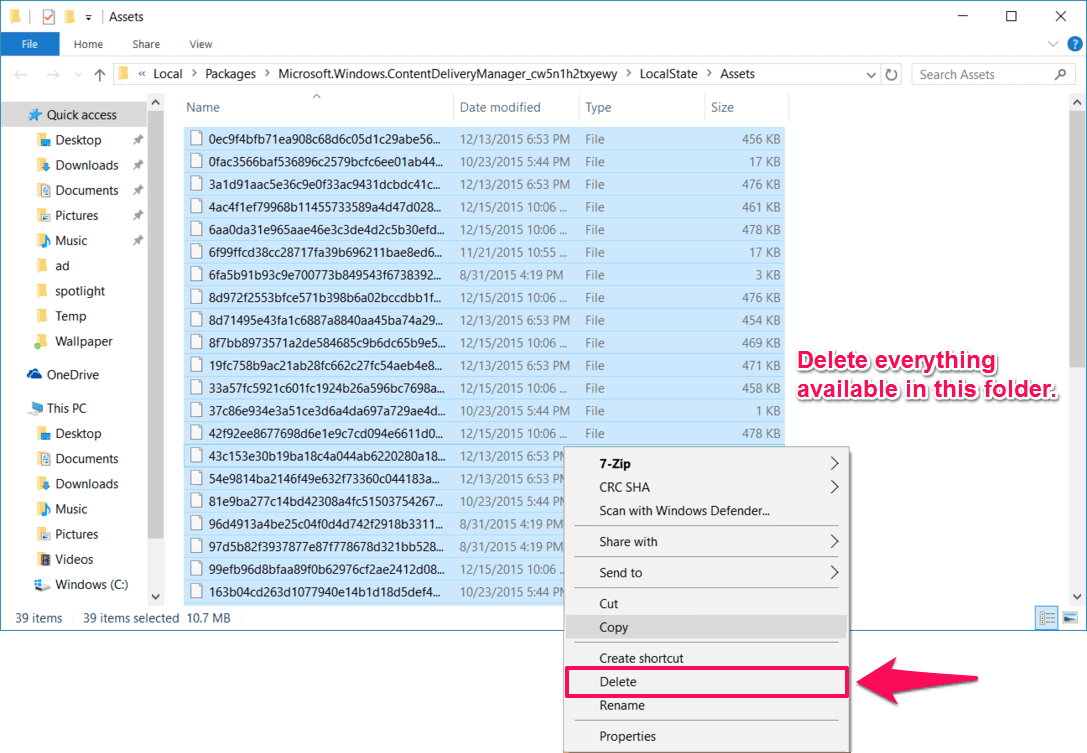
C:\Users\<USERNAME>\AppData\Local\Packages\Microsoft.Windows.ContentDeliveryManager_<Package ID>\LocalState\Assets
Note: Change the USERNAME with your username.
Step (5): Once you have opened the Assets folder on your computer, select all the items available there and delete all of them (make the folder empty).
Step (5): Finally, enable Windows spotlight feature by going Settings > Personalization > Lock screen > Background > Windows spotlight.
Now you can press Windows + L key to open lock screen. You should be able to see the Windows spotlight screen on your Windows 10 computer.
Method 2: Run System Maintenance Troubleshooter
If you were unable to fix Windows spotlight not working in Windows 10 by following the previous method then you can follow this Windows 10 troubleshooting method where we are going to run the System Maintenance Troubleshooter. So, are you ready to know how to solve Windows spotlight not working properly issue? Here we go.
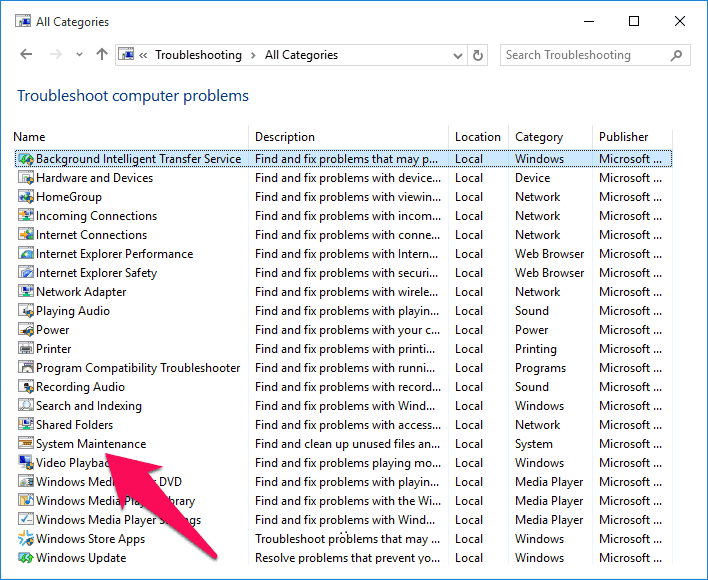
Step (1): At first, open the troubleshooting packages by going to Control Panel > Troubleshooting > View all. You will see the list of available built-in troubleshooters in Windows 10 here.
Step (2): Now you have to open System Maintenance troubleshooter and then click on Advanced option.
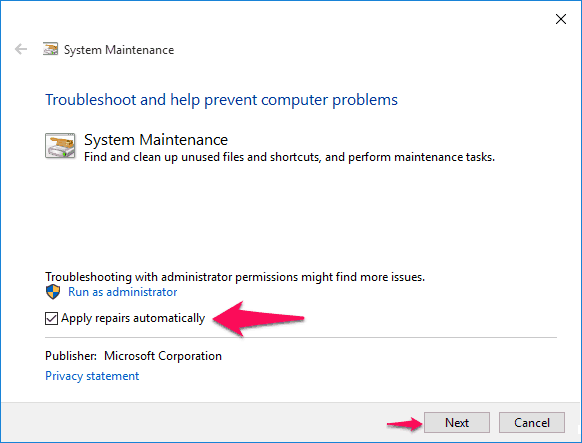
Step (3): After that select Apply repairs automatically option and then click on Next option. The troubleshooter will detect for the problems.
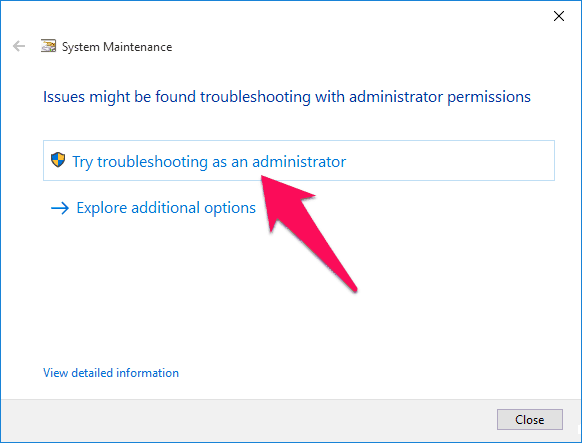
Step (4): If you see the notification message like Issues might be found troubleshooting with administrator permissions. Simply, click on Try troubleshooting as an administrator as you won’t be able to find some problems without having admin access.
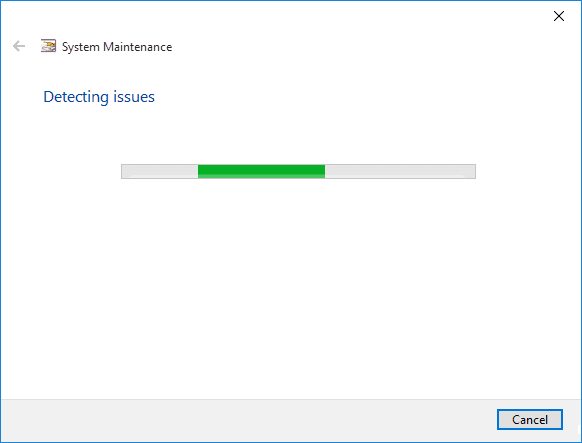
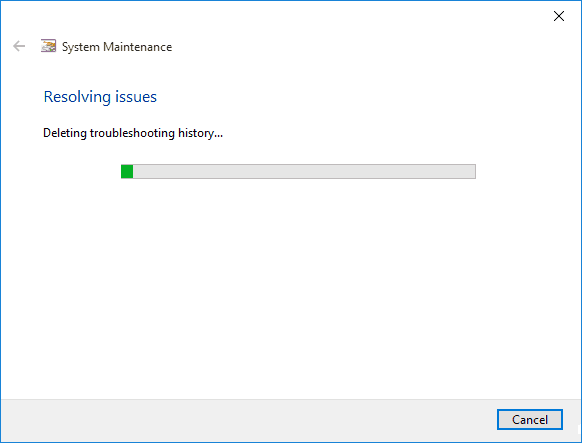
Step (5): Again the troubleshooter will start detecting issues which might be there on your computer and will cross check them with default settings of your computer.
Step (6): If there are any issues located, the troubleshooter will fix them automatically.
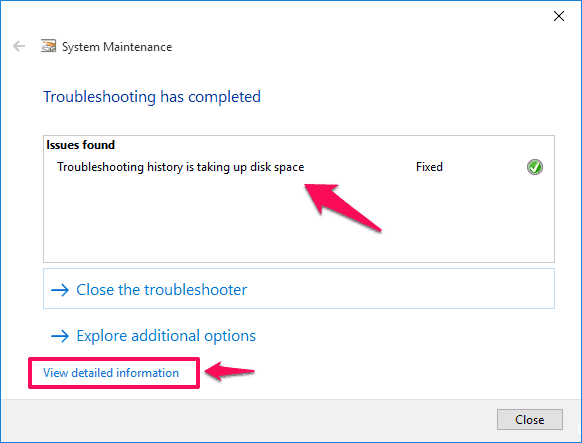
Step (7): Once the troubleshooting has completed and detected issue has been fixed, you will get a detailed report about the issue which has been resolved. You can click View detailed information link to see complete information about the troubleshooting operation:
Thus, you can easily explore on what settings system maintenance troubleshooter made checks and what issue gets resolved. Finally, click on Next button and then Close the troubleshooter.
Now, you can open the lock screen and you will be able to see the Windows spotlight feature working perfectly on your Windows 10 computer.
Conclusion
We hope after trying both the methods, problem (Windows spotlight not working) would be resolved. Windows spotlight is a great feature which is present in Windows 10 system. If you are not able to use the feature on your Windows 10 computer, you can follow any of these two Windows spotlight issue solving methods which we have shared above.
FAQ
How to save Windows Spotlight lock screen images so I can use them as wallpapers?
In order to find Windows spotlight lock screen image location and save Windows spotlight images so that you can use them as wallpapers:
- First of all, open Run dialog box by pressing Win + R key combinations.
- Enter in the following command and then Press OK.
%localappdata%\Packages\Microsoft.Windows.ContentDeliveryManager_cw5n1h2txyewy\LocalState\Assets
- A folder will be opened in File Explorer with non-specific file names.
- Copy and paste all the files into a new folder and rename all the files with the JPG extension.
Thus, you can easily get all the Windows Spotlight lock screen images in Windows 10 PC. Use them wherever and wherever you want and enjoy!!
Thank you very much. The first method worked fine with my issue.
i can get the windows spotlight image on my lockscreen or on my sign in screen , but not both.
when i say to add it to the sign in screen , it doesnt show on my lockscreen.
when i uncheck that, it then shows on lockscreen. cant get it on both screens. the sign in screen is green now. at least i see the image with the comments about the image now.
Neither method worked for me.
Still doesn’t work, but now I don’t have a picture other than the cave.
Before I had one of the pictures, but it didn’t change.
I have tried every spotlight fix I could find online, even multiple times. Nothing works, even through the Windows 10 updates, the lock screen is stuck on the same ugly image for eternity.