Want to learn how to screenshot on Windows 10 or how to take a screenshot on PC using keyboard shortcut? Here’s how to take a screenshot on windows 10 laptop.
As you are reading this tutorial, we can assume that you are interested in knowing how to take a screenshot on PC, how to screenshot on Windows 10 computer or how to print screen in Windows 10 laptop.
Is that right?
Well, there are times when we like to share or save some specific activity running on our laptop screen, computer screen with our friends or family members as it is simply interesting.
For the example: Let’s say, you were playing a game on your laptop and were able to make a high score which you want to show off to your friend who is not with you. At this point, you can simply take a screenshot of your computer screen and mail it your friend.
As most of the computers and laptops are running on Windows 10 OS, so we are going to share several methods which will help you in taking Windows 10 screenshot and print screen on PC. Some methods need using a tool while some simply don’t.
There are plenty of methods available on the web which you can follow to take screenshot on Windows 10 as per your choice but here we have mentioned some of the most helpful and easy to use methods for you guys. These below explained methods to take screenshot on laptop and take screenshot on computer will not only work on Windows 10 OS but also on several other versions of Windows such as Windows 8, 8.1 and Windows 7 too.
How to Screenshot on Windows 10 | Windows 10 Screenshot
Sometimes the simplest way to make a copy of something is to take a screenshot of your computer screen – this is what we are going to discuss today in this article. How to screenshot on laptop, how to screenshot Windows 10 screen, how to print screen on PC, and how do I take a screenshot on Windows 10 computer etc. are some of the widely searched terms over the internet, and that’s the main reason for us to bringing out this Windows 10 screenshot guide.
So, are you ready to know how to screenshot on Windows 10 laptop or how to take a screenshot on Windows 10 computer? Here we go.
Method 1: Using Print Screen Keyboard Shortcut (PrtScn)
We are sure that you will agree with this, using print screen keyboard shortcut (PrtScn) is one of the easiest methods to follow and it’s is available in almost all the Windows operating systems.
You don’t have to use any screen capture tool or software to take a screenshot on Windows 10 using this method as all you have to do is simply press a specific key using your Windows 10 keyboard. Here’s how to print screen on Windows 10 using print screen keyboard shortcut (PrtScn):
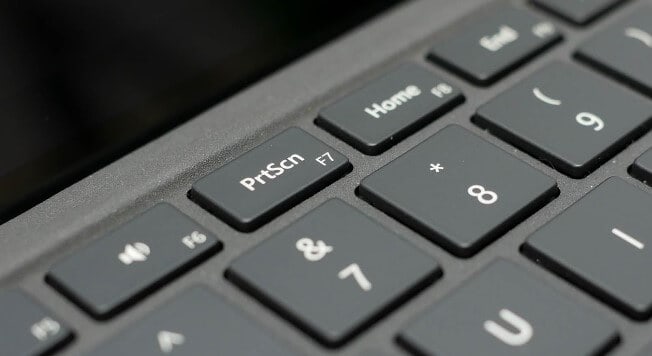
First of all, you have to open the screen which you want to capture. Once you have opened the screen, press the PrtScn key which is short for Print Screen. As soon as you will click this key, your current screen will get captured and will be saved on the clipboard.
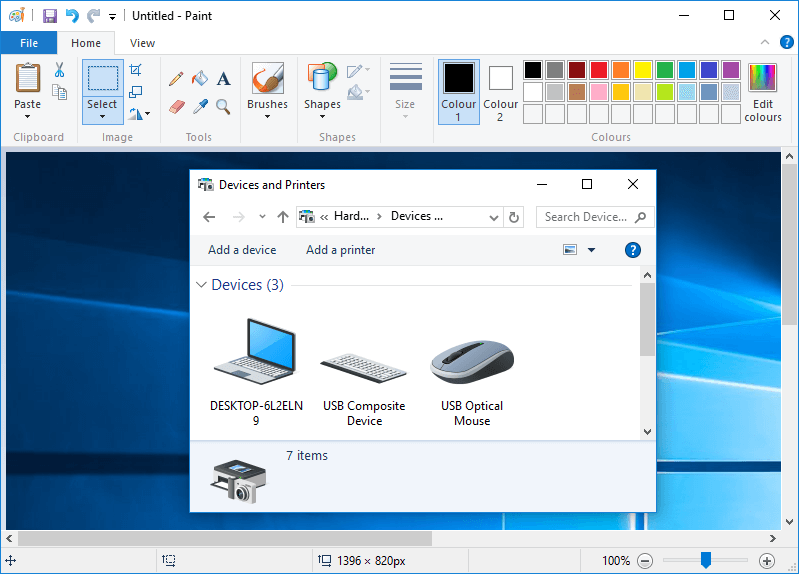
You need to remember that the screenshot you took won’t be saved in your hard disk automatically. In order to save the captured screenshot on Windows 10 computer, open Microsoft Paint and paste it by pressing Ctrl + V keys. Once you have copied the screenshot on Paint, click on Save As option which will save the screenshot.
That’s it! We hope you learned the simplest way to take Windows 10 screenshot and print screen on PC.
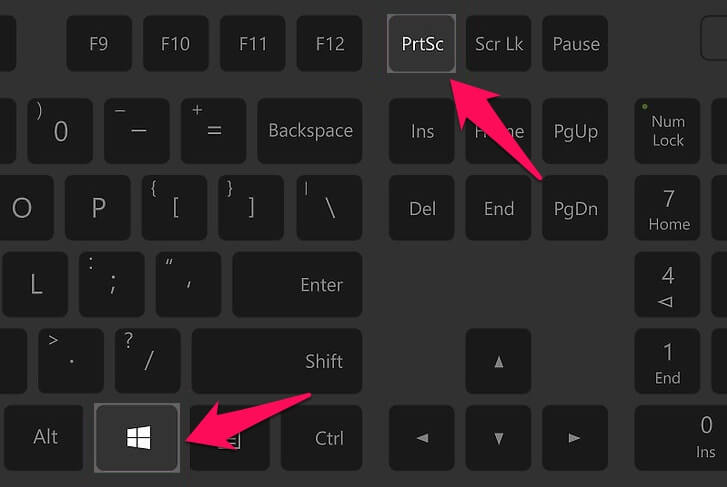
Method 2: Using Windows + PrtScn Keyboard Shortcut
The previous method (Print screen keyboard shortcut – PrtScn) helped you in taking screenshot on Windows 10 computer but in order to save the captured screenshot, you had to use Microsoft Paint which might be a little bit lengthy process for you. Is it right?
Well, if you are lazy or just want to save your time and wondering how to take screenshot on Windows 10 without doing much work then you can use the combination of Windows + PrtScn keys.
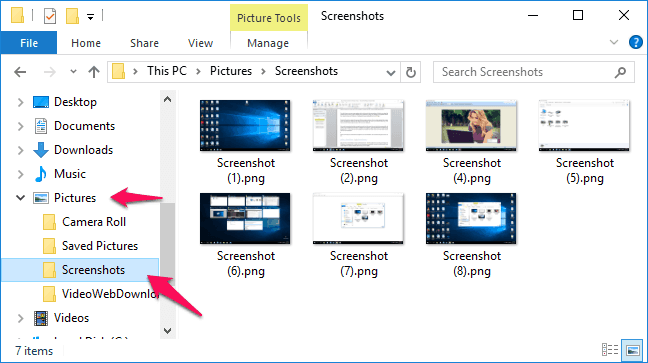
Just after pressing the Windows + PrtScn key combinations, your current Windows screen will be captured and saved automatically in the Pictures library in a folder named Screenshots.
Now, only you have to go to Pictures and then open Screenshots folder to see all your captured Windows 10 screenshots.
Method 3: Using Alt + PrtScn Keyboard Shortcut
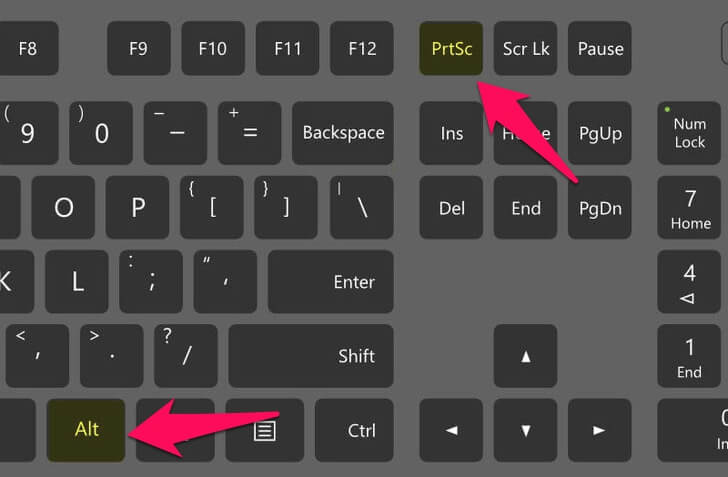
If you were looking for another Windows 10 keyboard shortcuts to take screenshot on PC then the use of Alt + PrtScn keyboard shortcut might solve your problem. Yes, you heard correct! This is the third method which you can use to screenshot Windows 10 laptop screen or desktop computer screen.
This method works on both Windows 8.1 and Windows 10 OS. So if you want to take screenshot of any active window on your Windows 10 or Windows 8.1 computer, you can follow this method.
Simply, open the window which you want to capture and then press Alt + PrtScn keys together. Now you can open Microsoft Paint or any other photo editing software which you are using on your computer and save the photo by pasting it inside that software. This method is almost similar to the first method which we shared above. You can try if you want.
So, this is how do you screenshot on a computer or how do I take a screenshot on Windows 10 using keyboard shortcuts.
Method 4: Using Snipping Tool Windows 10 Shortcut
The Snipping Tool has been a part of the Microsoft Windows operating systems for a long time (Windows Vista to Windows 8.1). And now Windows 10 also comes with this pre-installed screenshot capturing tool called Snipping Tool.
In simple words, Snipping Tool is the most effortless way to take a snapshot of your Windows 10 screen. As it is a preinstalled app, so you don’t have to download and install it. Just open Snipping Tool and start to screenshot Windows 10 screen.
Here’s how to take a screenshot on Windows 10 using Snipping Tool:
At first, type snipping tool in the search box and then select Snipping Tool desktop app from the search results. In case, if you are unable to open the Snipping Tool using search keyword you can open C:\Windowws\System32 folder as here you will find this tool.
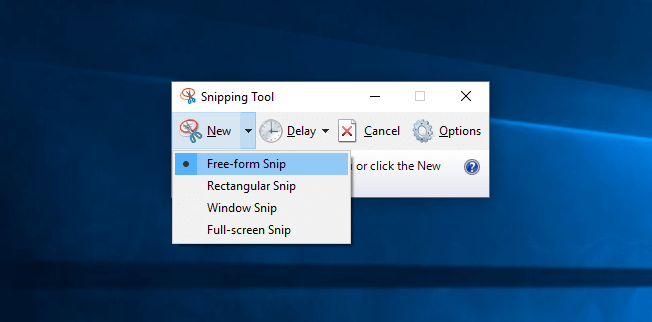
Once the Snipping Tool is opened, there are different options which you can use for taking screenshot on Windows 10 using the Snipping Tool:
- If you want to draw an irregular line next to an area or an object you can use the Free-form Snip option.
- If you want to take a screenshot in form of a rectangular box then you can use Rectangular Snip option.
- If you want to select a dialog box or include the window in a screenshot you can use Window Snip option.
- The fourth and last option is Full-Screen Snip which will take screenshot of the entire screen. This option functions just like Print Screen key.
Once you have captured the Windows 10 screenshot using Snipping tool you can click on Save snip option which will save the screenshot. You can even define the location where you want to save the screenshot which you just captured.
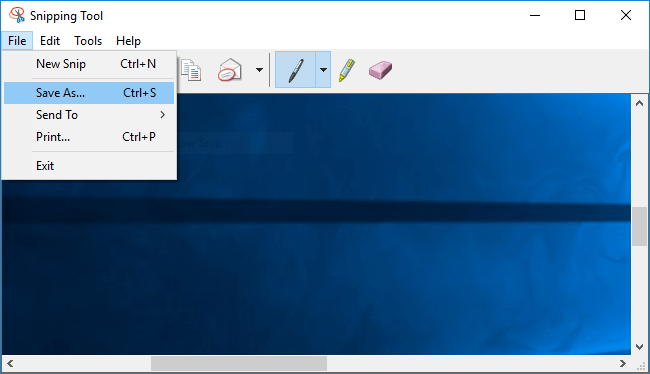
There is also an option to send the screenshots directly to your friends by select Send Snip option. You will get two options which are E-mail Recipient (attachment) and E-mail Recipient.
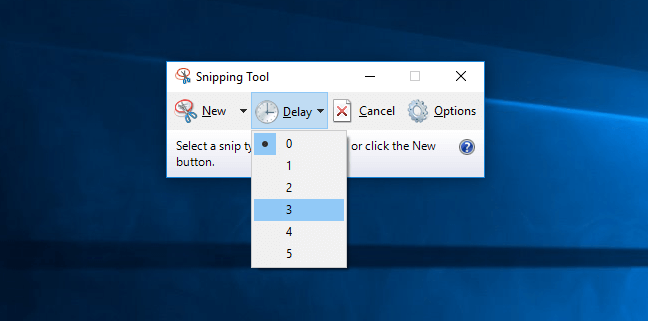
Addition to all these amazing screenshot capturing feature, Windows 10 Snipping Tool has a new “Delay” option which allows you to capture screenshots after specific duration (from 1 to 5 seconds).
So, this is how to screenshot on a laptop or computers running Windows 10 operating system. Use Snipping Tool to capture screenshots on Windows 10 and let us know what is your thought about it.
Method 5: Take screenshot on Microsoft Surface Tablet
We all know that Windows 10 comes in Microsoft Surface tablets also. If you are wondering how to take screenshot on Microsoft Surface tablet or similar products such as ASUS Vivotab, Dell Venue etc. then this method is best for you.
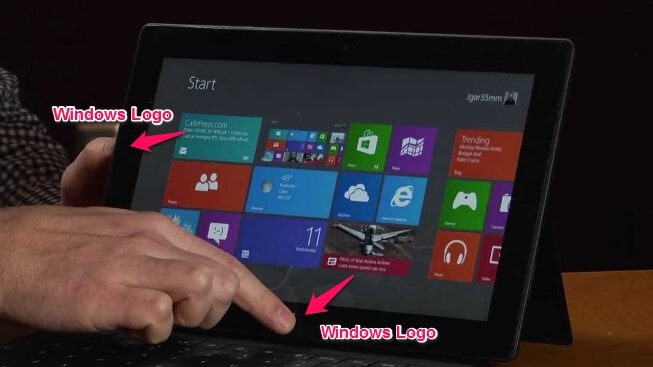
As there is no Print Screen (PrtScn) key available in Microsoft Surface tablet and using Snipping Tool to capture screenshots is really a very difficult task in touch screen devices, so you will have to use the combination of hardware buttons in this case.
In order to take a screenshot on Microsoft Surface tablet, you have to press the Windows Logo and Volume Down key together.
As quick you will press both keys together, you will see that your screen is going darker. This means that you have successfully captured screenshot on your Microsoft Surface Tablet. Now to view the screenshots you have captured, just go to Pictures library and then look for Screenshots folder.
We hope, know you know very well how to take a screenshot on a Microsoft Surface Tablet without using any screenshot capturing software.
Method 6: Using Microsoft Snip Editor
All the Windows 10 screenshot capturing methods which we have explained above should perfectly help you in taking a screenshot on Windows 10 computer, laptop, and Microsoft surface tablet etc. However, if you are still not able to take a screenshot on Windows 10 using any of the methods shared above then you can follow this last method.
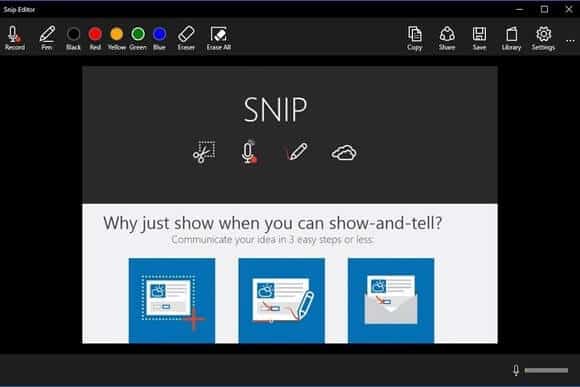
Microsoft Snip Editor is another helpful screenshot capture tool which is similar to Snipping tool and can be used to take screenshot on Windows 10 computers in many different ways. With Snip editor, you can easily capture a screenshot, photo or whiteboard drawing, annotate it with voice and ink, and share it with friends, family, and colleagues.
Simply, download Microsoft Snip Editor and install this application on your Windows 10 computer and with a single key stroke, you will be able to take the screenshot.
It’s as simple as using the PrtScn key but you are having several advanced options here such as editing the screenshots which you have captured, annotating the screenshots and much more. The Editor can be used to edit the screenshots which you have captured using this tool.
Thus, you can see how simple is to screenshot Windows 10 screen, print screen Windows 10 PC, and capture Windows 10 screenshots using keyboard shortcuts or screenshot capturing tools like Snipping Tool and Microsoft Snip Editor.
Conclusion
Even if you are a newbie, you will be able to take screenshots on Windows 10 computer by following these above-explained methods. These entire how to screenshot on Windows 10 methods are extremely easy to follow as all you have to do is press few keys or use just your mouse.
In your experience, what is the best way to take Windows 10 screenshot or print screen on a PC? Let us know using the comments section below. We always love to know your thoughts.
Do you think that this tutorial helped you in getting your all questions (how to screenshot on PC, how to take a screenshot on Windows 10 computer, how to print screen Windows 10 laptop, how do you screenshot on a computer, and how do I take a screenshot on PC etc.) answered?
Do you know? How to Take a Screenshot on Microsoft Lumia 535
Awesome. I am using Windows + PrtScr method to take screenshots on my Windows 10 laptop. Thank you very much for providing additional ways.
thnk you
It’s the easiest way to capture a screenshot while using windows 10, thanks for sharing because its handy for me as well.