Are you upset because of the hard drives or drivers not working appropriately on your Windows 10 computers? Or
Are you searching for any data recovery process or data recovery services to fix the problems occurring with your external hard drive?
If your answer is “Yes” then i would suggest you to run Check Disk. Basically, Check Disk is a profitable utility tool of Windows 10 operating system that helps you to find errors of drives or drivers. By using this Check Disk utility, you can identify the actual problems of your drive not working properly.
In today’s Windows guide, we are going to elaborate – how you can start Disk Error Checking in Windows 10. Here’s the step by step process:
Run Disk Error Checking in Windows 10
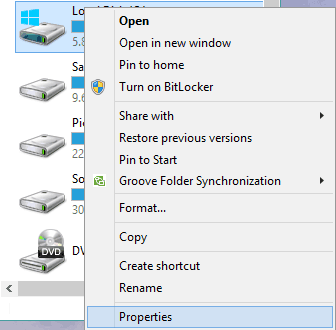
Step (1): First of all, open This PC on your computer and select the Drive which you want to scan for errors. Now, right-click on the selected Drive and then click on the option of “Properties”.
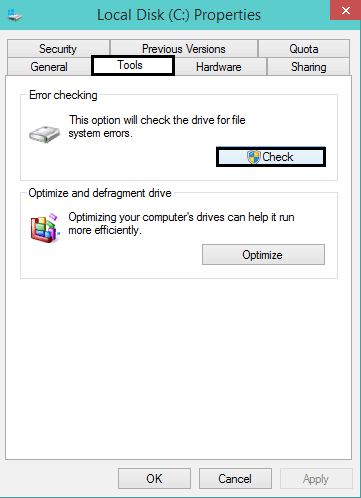
Step (2): After that Properties window will appear. On the Properties window, go to the Tools tab and under the “Error checking” section, click on “Check” button.
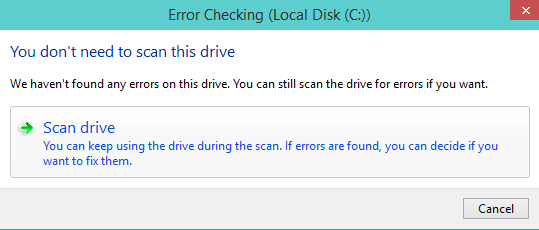
Step (3): Just after clicking on Check button, error checking (selected drive) wizard will appear on your screen. It will show you a message like “you don’t need to scan this drive“. Here you need to click on Scan drive link.
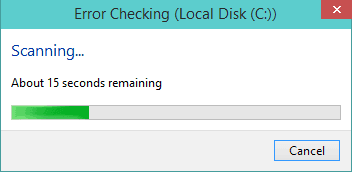
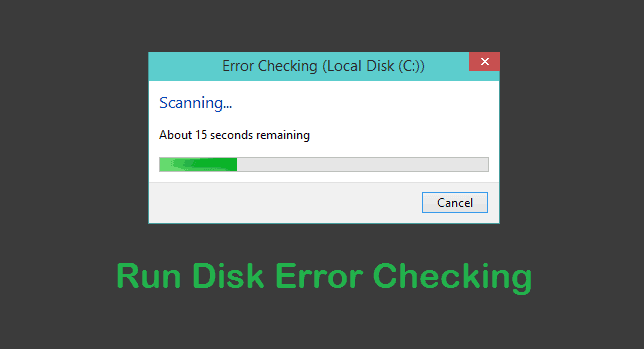
Step (4): Now, the Disk Error scanning process will begin. It will check for the errors available on your selected drive.
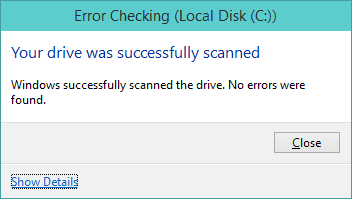
Step (5): When the scanning process is completed, you will be able to see the confirmation message such as: “Your drive was successfully scanned“. If you want to view the scanning details then click on Show Details link.
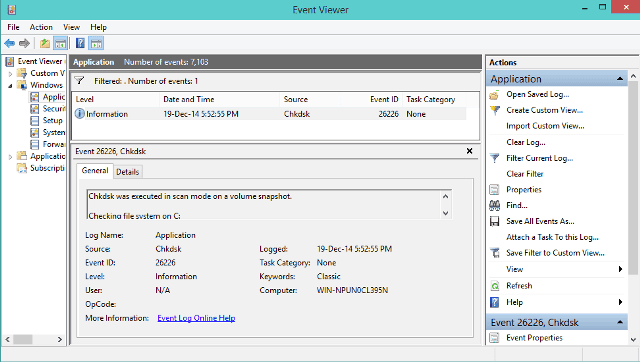
Step (6): The click on Show details will take you to the Event Viewer window, from where you can see the complete and detailed information of the current scan.
Step (7): After viewing the scanning result, Close the Error Checking wizard. That’s it.
See also: How to Update Driver Software on Windows 10 PC
Thus, you can easily find out the reason behind the problems occurs on hard drives or drivers of your Windows 10 PC. Try out it and share your view with us via comments.
Check Disk is really a very useful Windows Disk Error Checking tool that helps you to check local drive Errors within seconds. After using this utility tool, you haven’t to think about any data recovery process, data recovery services or reformatting hard drive.
To get more Windows help, computer tricks related to Windows 10 operating system, check out our Windows 10 tips and tricks section.
