Do you want to auto shutdown Windows 10 or schedule automatic shutdown in Windows 10 PC? Here’s how to auto shutdown Windows 10 using Task Scheduler and CMD.
How to auto shutdown Windows 10 without using any software? Is there any simple way to automatically shut down Windows 10 at a specific time?
What is the best method to auto shutdown Windows 10 after certain time?
If you are looking for the answers to these questions then our one-line answer is the use of Task Scheduler. Yes, you read correctly.
Computer software and tools have almost reached a point where if we program them correctly they can operate on their own completely autonomously. Among various other features, Task Scheduler help accomplishes this autonomy in Windows operating systems.
Undoubtedly, there are plenty of auto-shutdown timers for Windows operating systems and multiple methods available on the web that can be used to set auto shutdown in Windows 10 laptop or desktop computers but if you want more control over your Windows 10 auto shutdown schedule then using Windows Task Scheduler is the perfect solution for you.
That’s why in this guide, we are going to take a look at how to schedule automatic shutdown Windows 10 using Task Scheduler. So, without further ado, let’s begin.
How to Auto Shutdown Windows 10 using Task Scheduler
Scheduling automatic shutdown in Windows 10 using the task scheduler is pretty simple and it offers you all the control over the auto-shutdown scheduling. Only you have to do is create a basic task and choose the task timing and then make a few changes and you are done.
Follow these steps and learn how to schedule auto shutdown in Windows 10 using task scheduler:
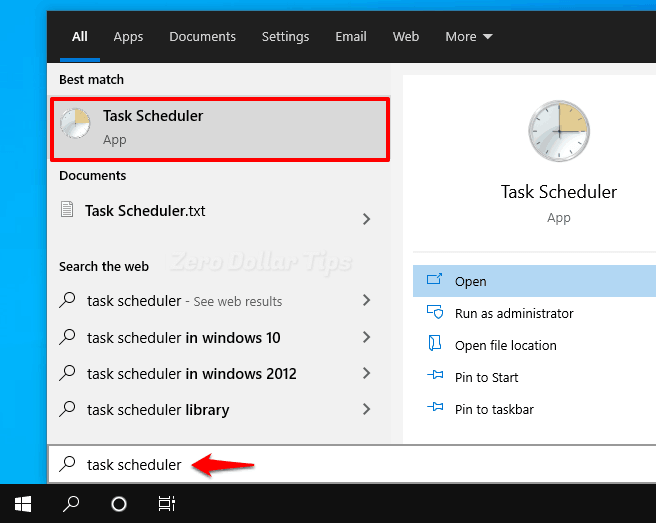
Step (1): At first, click on the Start button and then search for the Task Scheduler. Now from the search result, open the Task Scheduler.
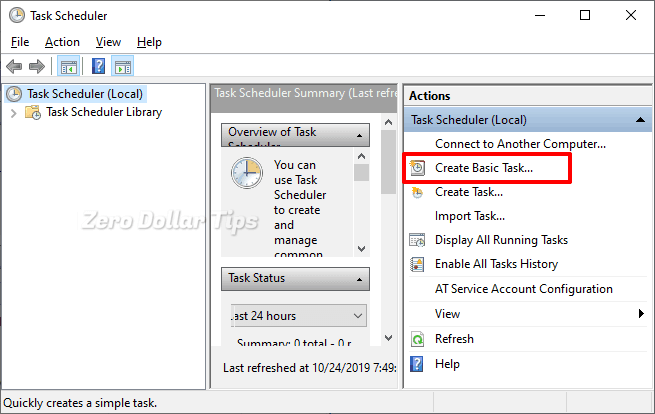
Step (2): On the Task Scheduler window, click on the Create Basic Task option located under the Actions section.
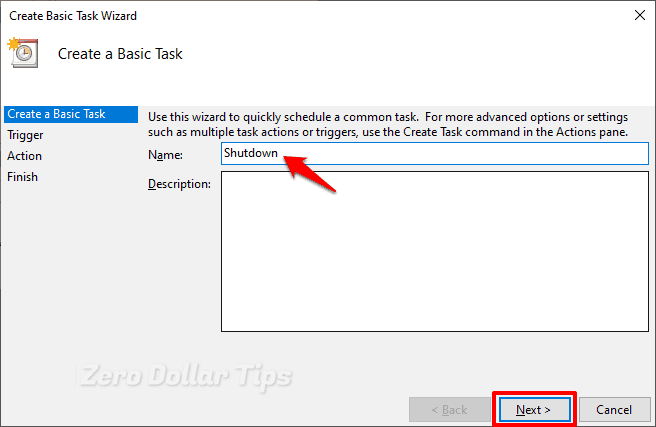
Step (3): Now on the Create Basic Task Wizard, type Shutdown as the task name and then click on the Next button.
Step (4): On the next window, choose when do you want the task to start from the list of Daily, Weekly, Monthly, One time, When the computer starts, When I log on, or When a specific event is logged option and then click on the Next button.
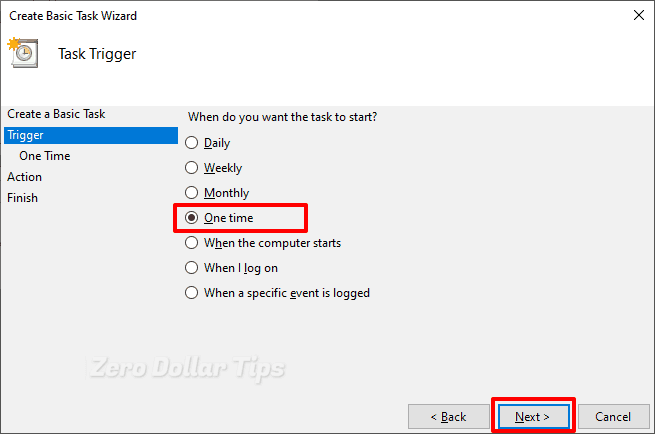
For example: Here we have selected the One time option.
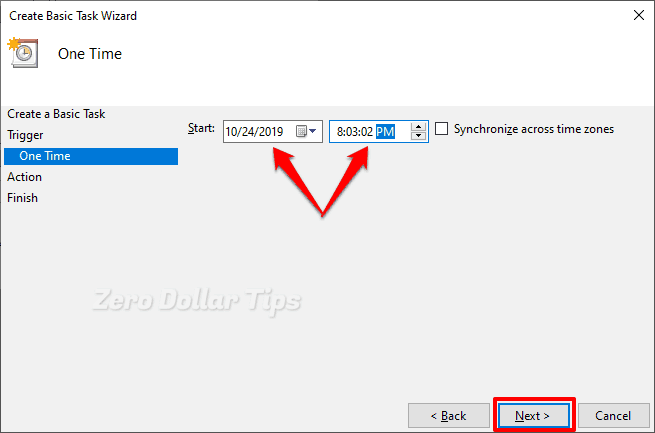
Step (5): Now enter the time and date for the task to start and then click on the Next button.
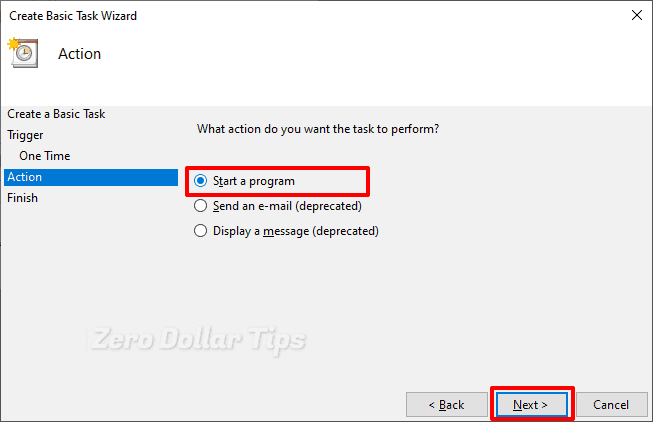
Step (6): Under the Action tab, select Start a program option and then click on the Next button.
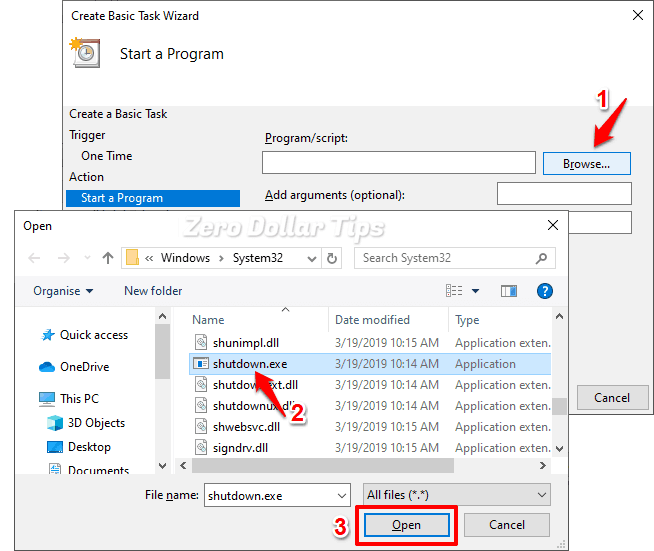
Step (7): On the next window, click on the Browse button and then go to the C:\Windows\System32 folder and select a file called shutdown or shutdown.exe and then click on the Open button.
Step (8): Now in the Add arguments field, type -s and then click on the Next button.
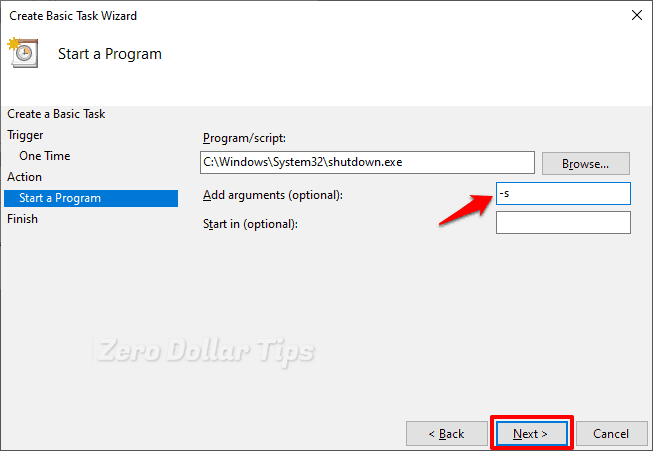
Step (9): Finally, in the Summary windows, see all the task information for one last time. And if everything is accurate, simply click on the Finish button to schedule shutdown in Windows 10 PC.
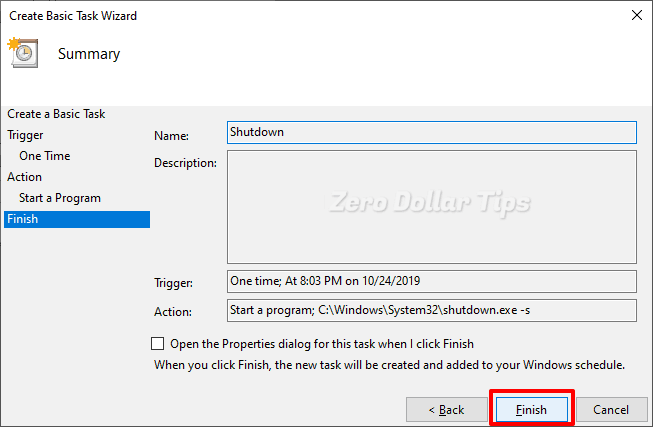
Once you followed all these steps precisely, Windows Task Scheduler will automatically shutdown Windows 10 at a specific time as you have programmed it to.
How to Auto Shutdown Windows 10 using CMD
In case, if you don’t wish to go through all the complex task scheduler settings (as explained above) and want an easiest solution to schedule automatic shutdown in Windows 10 then using the command prompt is the best approach in such a situation.
Follow these steps and learn how to set auto shutdown in Windows 10 using command prompt:
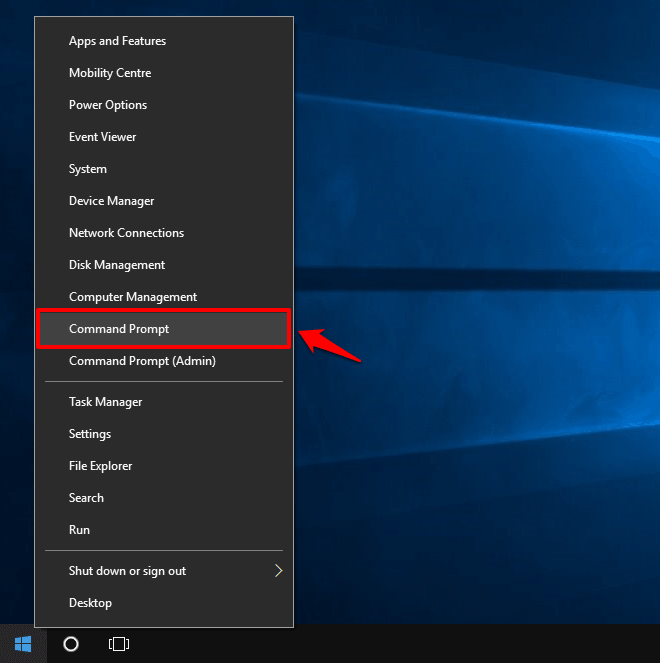
Step (1): First of all, right-click on the Start button and then select Command Prompt from the power user menu.
Step (2): Now in the Command Prompt window, type shutdown –s –t 600 (i.e. 10 minutes) and then press Enter key.
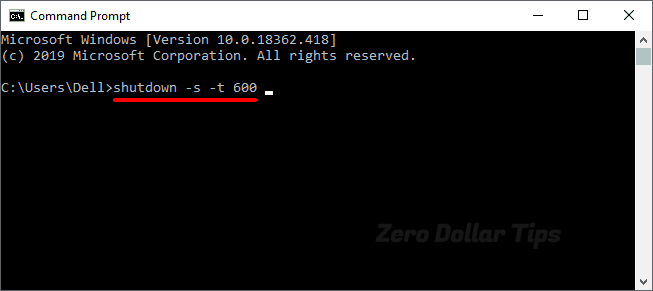
Here 600 represents the number of seconds (60 x 10 = 600 seconds). So in this case, the computer will be turned off automatically after 10 minutes.
Simply, replace 600 by any number you wish. Here 600 is for 10 minutes. If you want to automatically shut down your Windows 10 computer in 30 minutes then just multiply 60 x 30 and use that number to replace 600.
You can also use the same command in a similar manner to set auto shutdown for Windows 10 using PowerShell instead of the Command prompt window.
Thus, you can see how simple is to schedule automatic shutdown in Windows 10 using task scheduler and command prompt.
Conclusions
We hope that we were able to answer all your questions, how to set auto shutdown in Windows 10 using CMD and how to auto shutdown Windows 10 using task scheduler? If you have any more queries regarding the Windows 10 auto shutdown scheduling, feel free to let us know in the comments below.
While you are down there, if you need any help with any other Windows 10 troubleshooting or software walkthrough then, leave us a comment and we shall certainly help you out.
You may also be interested in checking out:
- How to Set Auto Shutdown in Windows 10
- How to Speed Up Windows 10 Shutdown Process
- How to Fix This App is Preventing Shutdown Windows 10 Issue
- How to Speed Up Windows 10 Startup and Shutdown Time
- How to Automatically Shutdown Windows 7 PC at Night
- How to Shutdown or Restart Remote Desktop Connection Windows 10 PC
Very nice post.
I wanted to learn how to schedule automatic shutdown in Windows 10 and this guide literally helped me very clearly with steps.
Great work!!