Having DNS Cache corruption or internet connection problems in Windows 10? Flushing DNS cache will help you. Here’s how to flush DNS Cache in Windows 10 PC.
Most of us feel extremely frustrated when few websites which we visit on a regular basis show a spinning wheel and never finish loading up. And the same sites seem to be working fine on other devices.
Has this happened to you?
If yes then you need to know that generally, this annoying thing happens due to the DNS Cache corruption issue.
DNS Cache (also known as DNS Resolver Cache) is a temporary database which is maintained by the computer’s operating system. It stores the location (IP addresses) of web servers that contain web pages which you have recently accessed. If the location of any web server changes before the entry in your DNS cache updates then you can no longer access that site.
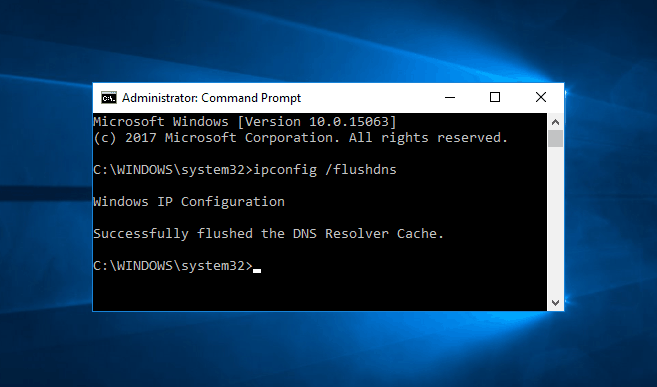
In such situation, clearing DNS cache is the most appropriate way to resolve DNS Cache corruption and internet connection problems.
Here, we are going to show you how to view, disable, flush and reset the DNS Client Resolver Cache in Windows 10 using the command prompt.
How to Flush DNS Cache in Windows 10
The process of flushing and resetting the DNS Client Resolver Cache is very simple and it doesn’t take too much time. Follow these steps to flush DNS cache in Windows 10 using CMD:
Step (1): First of all, open Command Prompt as administrator by right-clicking on the Start button and then selecting Command Prompt (Admin) option.
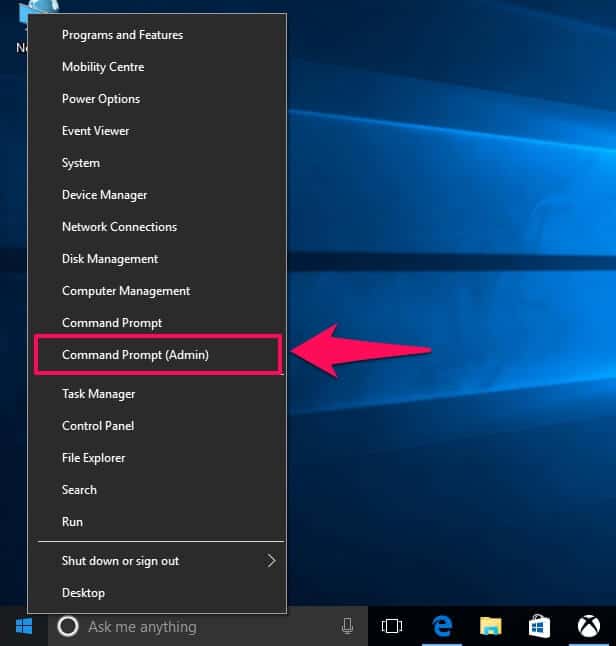
Step (2): Next, type the following command in the command prompt window and hit Enter key:
ipconfig /flushdns
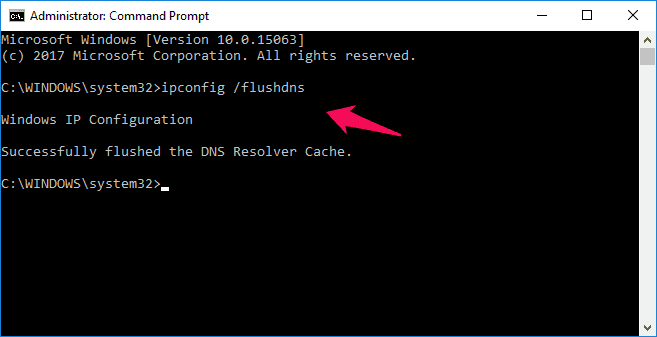
Step (3): Now, the DNS cache will be flushed and you will see a confirmation message saying “Windows IP Configuration. Successfully flushed the DNS Resolver Cache.” That’s it!
The older DNS cache files have been removed from your Windows 10 computer which might have been causing the errors (like this website is not available or unable to load particular websites) while loading a webpage.
How to View DNS Cache in Windows 10
After flushing DNS cache, if you want to confirm that DNS cache has been cleared or not then you can apply the following command to view DNS cache in Windows 10 PC.
Step (1): At first, open command prompt with administrative privileges by right-clicking on the Start button and then selecting the Command Prompt (Admin) option.
Step (2): Next, type the following command in the command prompt window and hit Enter key:
ipconfig /displaydns
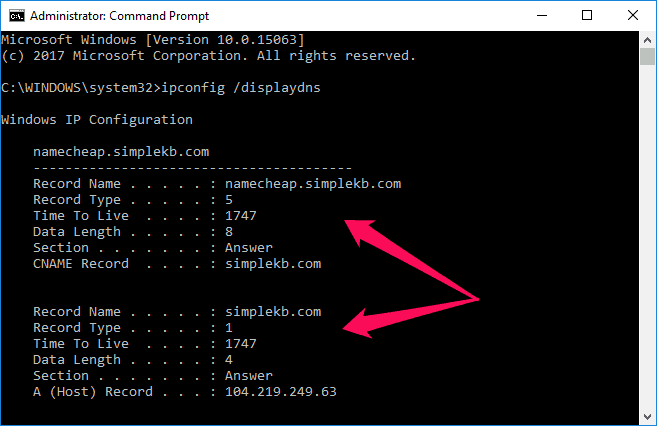
Once you apply this command, it will display the DNS cache entries if there is any.
How to Disable DNS Cache in Windows 10
For any reason, if you wish to disable DNS Cache for a while and enable it again then you can apply these following commands.
Step (1): At first, open Command Prompt as administrator by right-clicking on the Start button and then selecting Command Prompt (Admin) option.
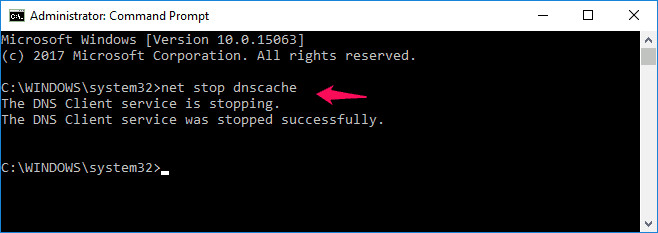
Step (2): Next, type the following command in the command prompt window and hit Enter key:
net stop dnscache – To disable DNS caching
net start dnscache – To enable DNS caching
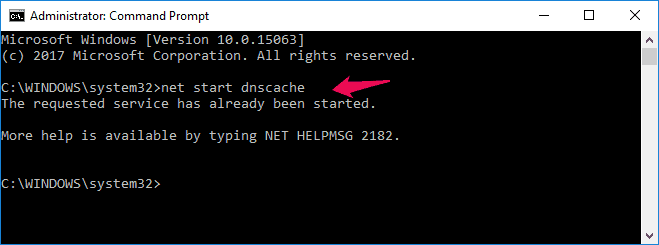
One thing you need to keep in your mind that this disabling DNS cache command is applicable for a particular session only and when you will restart your computer, the DNC caching will be enabled automatically.
Thus, you can see how simple is to disable, enable, view, clear, and flush DNS Cache in Windows 10 computer.
Follow the above-explained instructions carefully in order to repair corrupt DNS cache and get rid of internet connection problems in Windows 10 PC.
This flush DNS Windows 10 guide will work perfectly on almost all Microsoft Windows operating systems (Windows 10, 8, 7, XP etc).
You might also like to see: How to Change DNS Server on Windows, Mac, and Android