Restore computer to earlier date using Windows System Restore. Here’s how to create a System Restore point in Windows 10 and enable Windows 10 System Restore
Everyone wants to have some fun with their computers. This fun can be tweaking the settings of their Windows computer or customizing it in order to change its appearance. There are times when you change the settings of your computer and after the reboot, you are not able to access your computer the way you last accessed it as you have just messed with the settings of your system.
Many people don’t know but there is an interesting and very helpful feature in Windows computers known as “Restore point”. Restore Point is available in all the versions of Windows operating system, even in the latest Windows OS i.e. Windows 10. Basically, Restore Point is a backup of your computer which includes all the settings and configuration of different software’s which are running on your machine.

Now you might be wondering how to create a system restore point in Windows 10 computer?
Don’t worry, it’s quite easy to create a restore point in Windows 10 and in order to achieve this you have to follow a few couple of steps. But before we share those steps with you, we first need to find out how to enable system restore Windows 10 feature. So, here we go.
How to Enable Windows 10 System Restore Point
In order to enable System Restore Windows 10 feature, you have to just turn on system protection for Windows 10. Follow these below-mentioned step by step instructions for enabling system restore in Windows 10 computer:
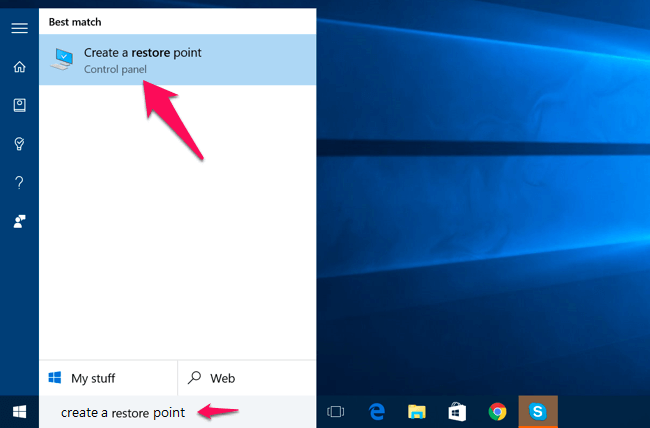
Step (1): At first, open Start Menu on your Windows 10 computer and type Create a Restore Point in the search box then press Enter key to open the “System Protection” settings page.
Alternatively, you can navigate to this exact same location in Windows 10 by going to:
Control Panel > System > System Protection.
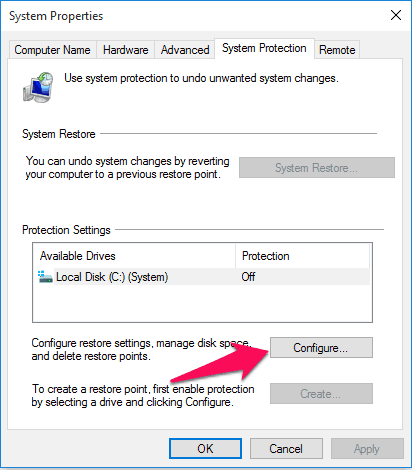
Step (2): If the system protection for Windows 10 is not enabled on your PC then you won’t see “Create” button. So, now you have to choose the drive where Windows is installed (C Drive) and then click the “Configure” button.
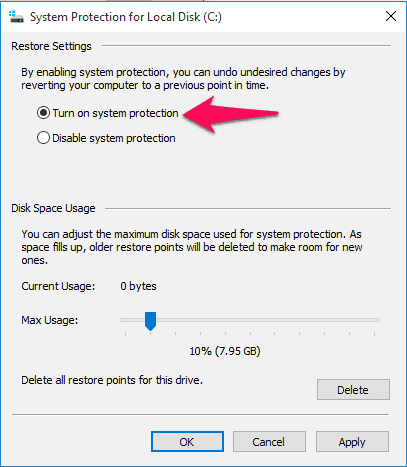
Step (3): Just after the click, Restore Settings dialog box will appear on your computer. From here, you have to select “Turn on system protection” option which will enable Windows 10 system restore.
Under the Disk Space Usage option, there is an option to adjust maximum storage space which you are doing to dedicate to the restore points. There is a small percentage of total HDD space used by default so it is totally up to you how much space you are willing to allocate here.
Step (4): So, once you have selected the Turn on system protection option and the Maximum disk space, click the Apply button and then OK. That’s it!
Thus, you can easily enable system restore feature in Windows 10 PC. Now that you know how to enable Windows 10 system restore point, you can follow the next part of this post where we are going to tell you how to create a system restore point in Windows 10 system.
You might also like: How to Delete Junk Files in Windows 10 to Free Up Disk Space
How to Create a System Restore Point in Windows 10
Creating system restore point in Windows 10 PC is really a pretty simple task. Follow the below-explained steps and find out how you can easily create system restore point Windows 10:
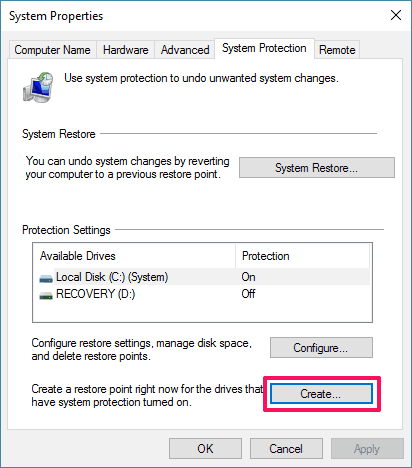
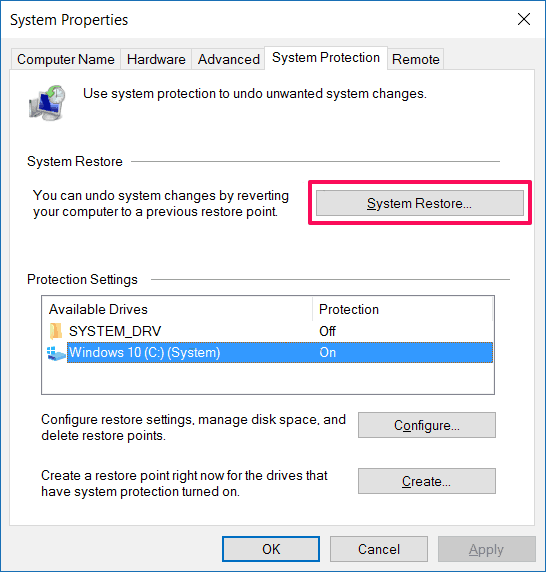
Step (1): If you want to create a system restore point manually on your Windows 10 computer, click on “Create” button from the System Protection tab.
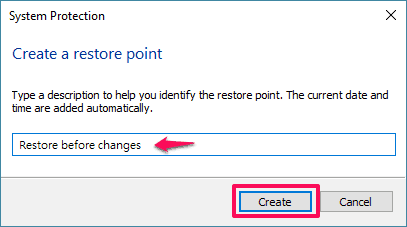
Step (2): Enter some description in the description tab so that you know when you created the restore point. For example: Before installing XYZ app or whatever you like.
Step (3): Once you have entered the description on create a restore point dialog box, click the Create button and the process of system restore creation will start.
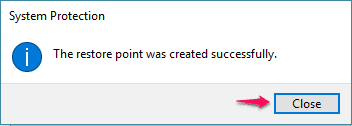
Step (4): One the Windows 10 system restore creation process is completed, you will see “The restore point was created successfully” message on your screen. That’s it!
Thus, you can see how simple it to create a system restore point in Windows 10 computers. Now you can easily restore your computer to this System Restore Point whenever you need. Check out the below guide to know how to restore windows computer using System Restore points.
You might also like to see: How to Restore Previous Versions of Files in Windows 7
How to Restore Windows Computer using System Restore Point
If you have already created a system restore point of your computer a while ago and now want to restore your computer using System Restore point then you can follow the steps which we have mentioned below:
Step (1): Open Start menu on your computer and type Create a restore point in the search box then hit the Enter key to open System protection settings page.
Step (2): Now click on the “System Restore” option from System protection tab and then select “Next” option on Restore system files and settings page.
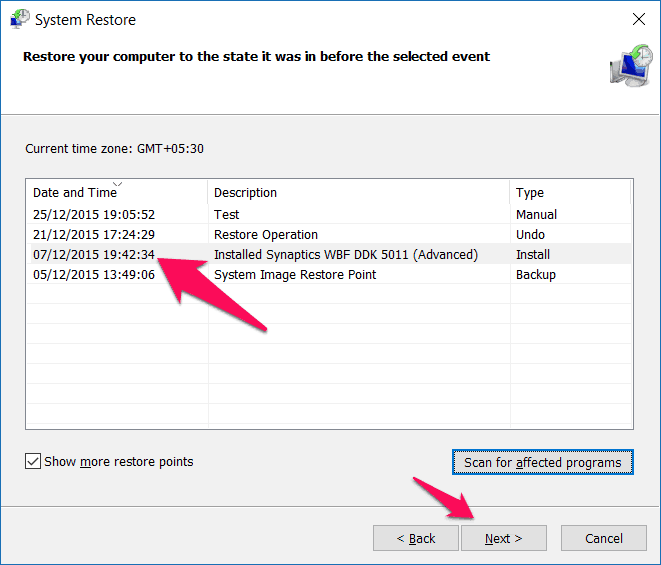
Step 3): All the restore points which you can use will be displayed on your screen with information like description, date and time, and type. Just Select a Restore point which you want to use for restoring your computer and then click on the Next button.
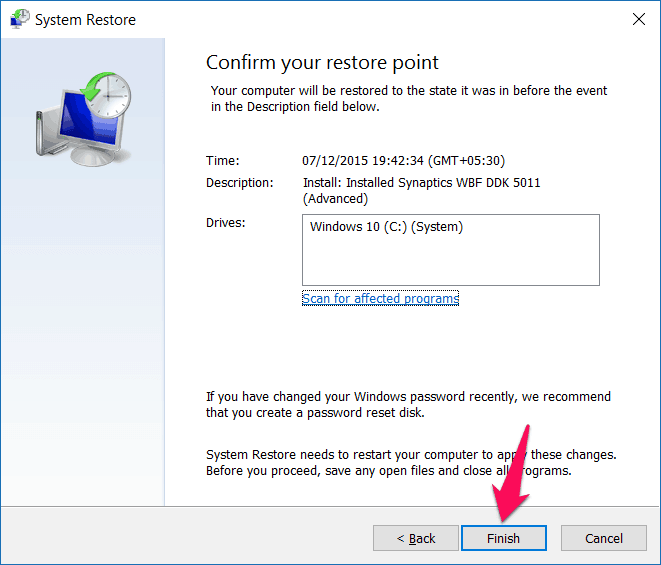
Step (4): Finally, click on the “Finish” button which will start the restoring process on your computer.
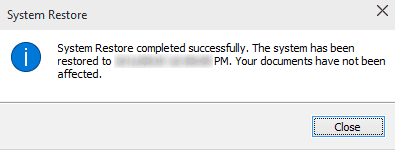
Step (6): Once the Windows restore process is completed you will be able to see “System Restore completed successfully” message on your computer screen. That’s it!
Now your computer will get back to the state when you created the restore point. Follow all steps currently and restore Windows 10 computer to an earlier date. Thus, you can see how simple the process of restoring windows computer is.
Conclusion
We hope now you are able to easily enable Windows 10 System Restore, create a System Restore point in Windows 10, and restore Windows Computer using System Restore points by following the above-mentioned guides.
If you are having any doubts or questions regarding System Restore Windows 10 or Windows 10 System Restore process, let us know using the comments section below.
Did you find this create Windows 10 System Restore and restore computer using System Restore in Windows 10 guide useful? Please, consider sharing it on Twitter, Google+ and Facebook.
Don’t Miss Reading These Helpful Windows 10 Tutorials:
- How to Free Up Disk Space on Windows 10 Computer
- How to Add System Compression in Disk Cleanup on Windows 10
- How to Fix “The system cannot find the file specified” Error
- How to Make Windows 10 Faster and Improve Its Performance
- How to Create and Format a Hard Disk Partition in Windows 10
