Do you want to rename Windows 10 printer or change the name displayed for network printer? Learn how to change printer name in Windows 10 computer.
There are plenty of ways to perform different functions and operations on different versions of Microsoft Windows operating systems.
Still, lots of newbie computer users get confused when it comes to making few simple changes on their system.
Isn’t it true?
For the example: Within a week, more than ten Windows users have already asked us plenty of similar questions regarding Windows 10 printer such as: how to rename a printer in Windows 10 Home computer? I am unable to change printer name Windows 10, what to do? how to change the name displayed for network printer in Windows 10? how to change default Windows 10 printer names? etc.
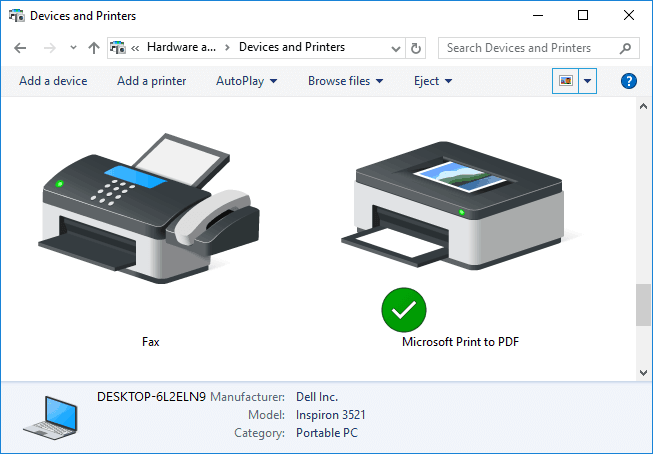
If you were using Windows 7 or Windows 8 earlier and have recently upgraded to Windows 10 operating system then you might be also thinking how to change printer name in Windows 10 PC. The process of renaming printer or changing printer name in Windows 10 is a bit different as compared to other versions of Windows like Windows 7, Windows 8, and Windows Vista etc.
Although the printer renaming procedure is very simple, all you have to do is make few changes in the settings and you will be able to change Windows 10 printer name. Here we go.
How to Change Printer Name in Windows 10
When you install a new printer on your computer, Windows usually names it after the manufacturer name or model name by default. Follow the step by step instructions shared below as it will help you in changing the name displayed for network printer or changing printer name in Windows 10. Here’s how:
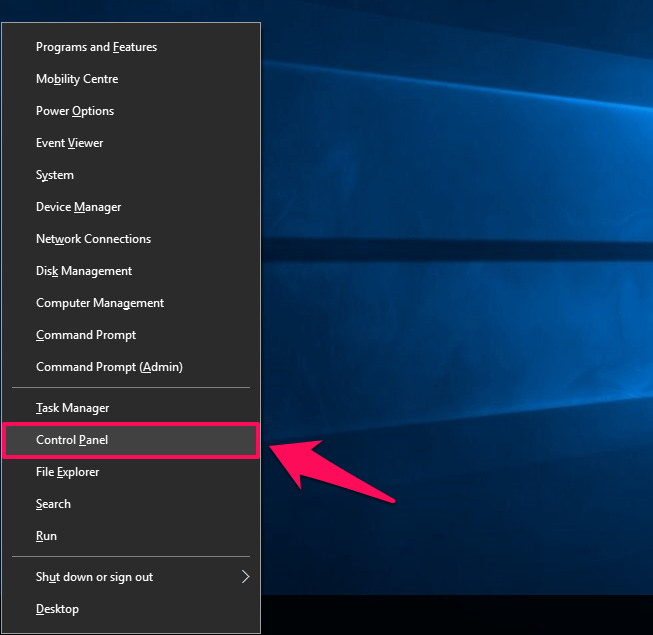
Step (1): First of all, press the combination of Windows + X keys together to open power user menu and then select “Control Panel” option.
Alternatively, you can also open Control Panel from the Start menu of your Windows 10 computer.
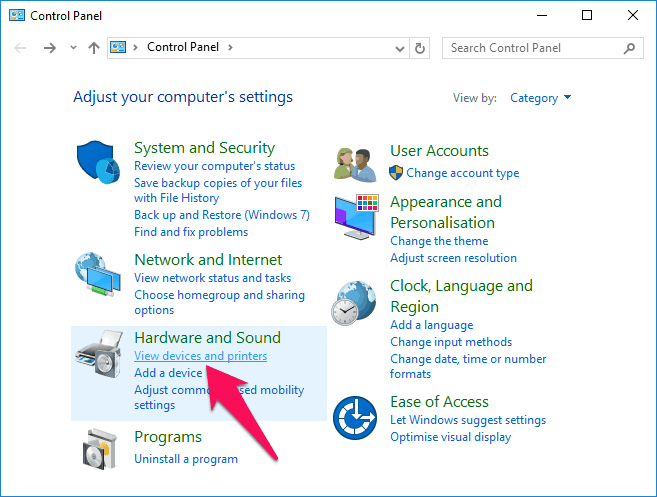
Step (2): Once the Control Panel window is opened, click on the “View devices and printers” option which is available under the Hardware and Sound section.
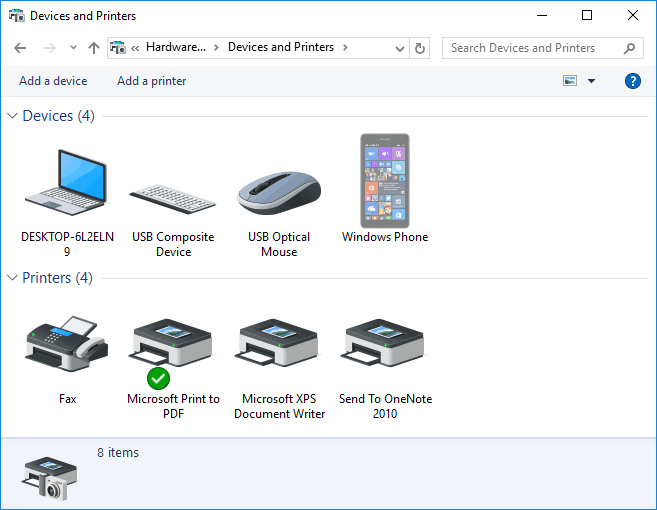
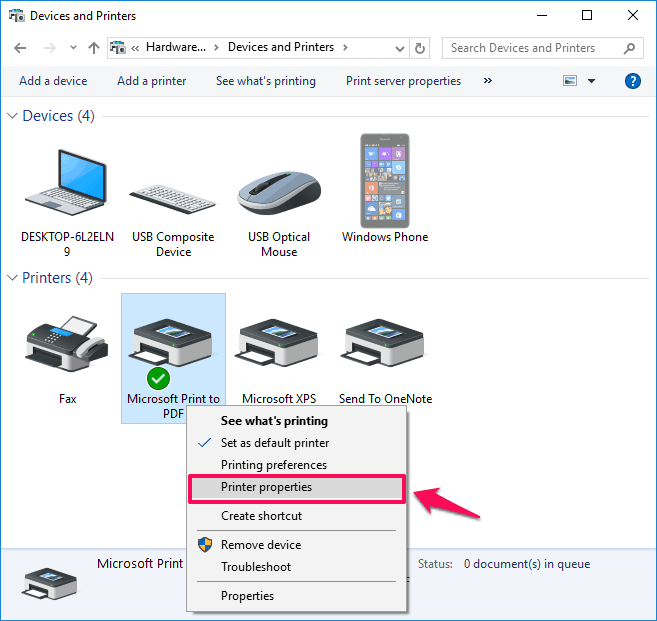
Step (3): On the Devices and Printers window, you will find all the printers which are installed on your Windows 10 computer.
Step (4): Simply, right click on the printer whose name you want to change and select “Printer Properties” from the menu.
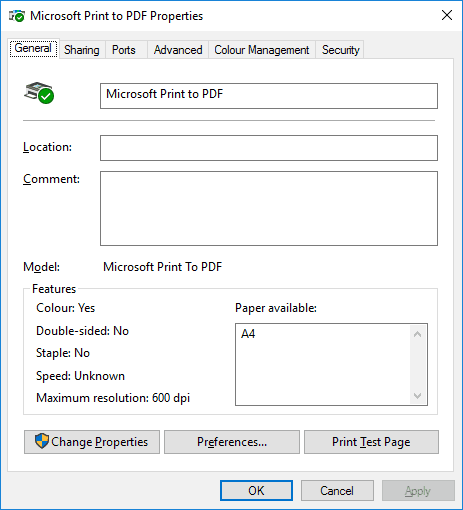
Step (5): Now a new window will appear on your computer screen and you will see the printer name which your printer is currently using. The name will be present in Input field.
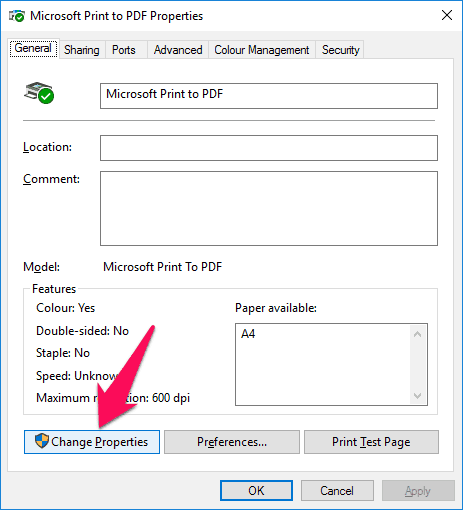
Step (6): In order to change printer name in Windows 10 or change the name displayed for the network printer, you have to click on the “Change Properties” button.
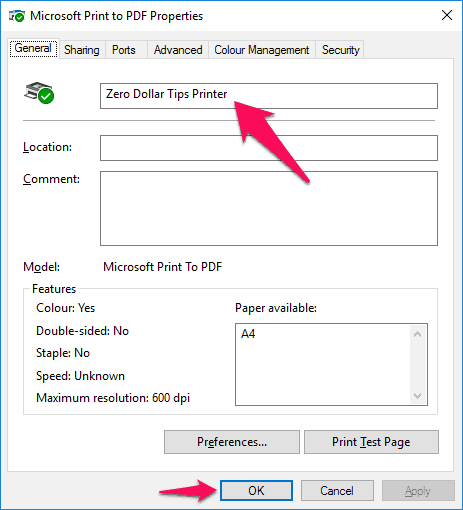
Step (7): Finally in the next window, you can remove the old printer name which you were using and simply type the new printer name according to your wish.
Step (8): Once you have given a new name to the printer, you can click on OK button for the changes to be saved.
That’s it! Now, you have successfully renamed network printer on Windows 10 computer.
Conclusion
Thus, you can see how simple is to change Windows 10 printer name. In a similar way, you can rename other Windows 10 compatible printers without any difficulty. This is the simplest method which you can follow to change printer name in Windows 10 system.
Are you using any other method to change the name displayed for network printer or still unable to change printer name in Windows 10 PC or want to know how to rename printers compatible with Windows 10 computer? Let us know using the comment section below.
Do you know? How to Fix “Windows cannot connect to the printer” Error in Windows 7
Great article!…
This does not work for network printers. I am having trouble renaming network printers.