If you are using Windows 8 then probably you may have noticed that Windows 8 operating system includes a new and very helpful recovery feature called Automatic Repair. Many users are familiar with this amazing Windows 8 automatic repair features but many people are still unknown or not using it.
Automatic repair feature can be more advantageous for you if by any reason your Windows 8 computer is not able to boot or startup, In this case it will come into action very quickly and will try to distinguish and fix the issue as soon as possible.
According to the requirement, it will scan whole system files, configuration settings, registry settings and many other settings files in order to fix the problem automatically. A quick guide to automatically repair Windows 8 using Automatic Repair is shown below, read and follow the steps very carefully.
Recommended: How to Activate Windows 8 by Phone
How to Use Windows 8 Automatic Repair
Step (1): To access Automatic Repair on Windows 8, firstly go to Windows 8 Start Screen and just type “Advanced” and then from the search results click on the Settings category.
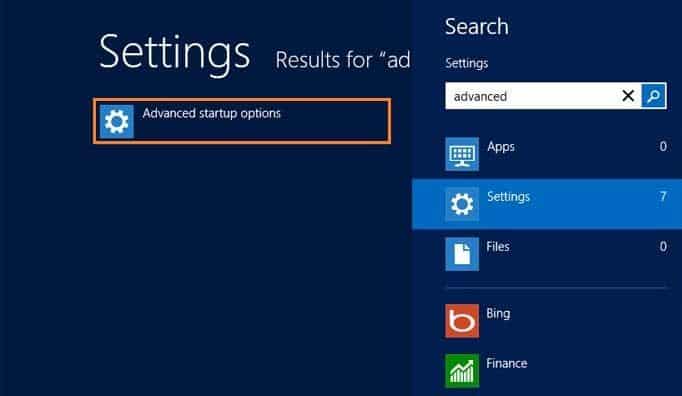
Step (2): After that click on Advanced startup options to go on the General PC Settings screen, from the available options click on Advanced startup and then click on Restart now button.
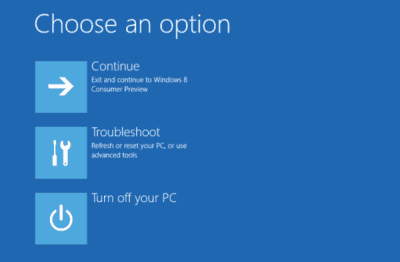
Step (3): This will let you restart your Windows 8 computer. On the restarted, you have to click on Troubleshoot button.
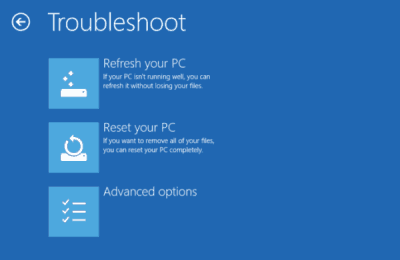
Step (4): Under the Troubleshoot section click on the Advanced options button.
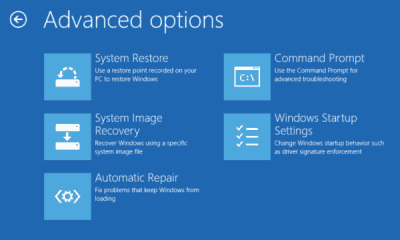
Step (5): And then under the Advanced options, click on the Automatic Repair option.
Step (6): Here, you will be asked to select the User Account to proceed. So, enter required account details (ID and Password) and then click on Continue.
Now, Windows 8 Automatic Repair will start to recognise and resolve the issues available on your computer. Automatic Repair process will take few times and even your system may boot too. So, no need to be worried.
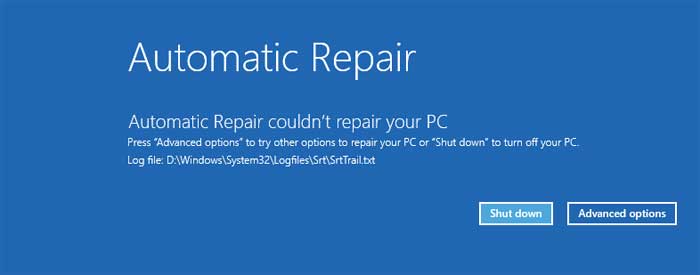
Once the Automatic Repairing process completes successfully, you will be able to see a message to this consequence such as: Automatic Repair has repaired your PC, or Automatic Repair couldn’t repair your PC.
For example, if Automatic repair fails then you will get an error message as shown in below screenshot:
Let me know via comments – Was this windows 8 automatic repair tutorial helpful for you? Your valuable comments will help us to provide you more exclusive tutorials, tips and tricks related to Windows 8.
Hey Bro,
Windows 8 Automatic Repair Feature is really an awesome feature for all the windows 8 users. I was still unknown from this helpful feature. Thanks to your great tutorial, I knew about it and its completely process. I am going to try out right now.
Keep sharing and inspiring us Bro 🙂
Hii Ashu,
I am really happy to read your lovely comment. It’s really great to know that you found this tutorial useful for you. Keep visiting and sharing your view with us 🙂