Have you ever wished to install custom recovery on your Android smartphone or tablet?
If you are using android device and have searched for hacks for your android device you might have come across a common term called custom recovery.
In order to flash or hack your android device you need to install custom recovery on your device. Custom recovery is available for all the android devices and once you have installed custom recovery you will be able to install custom roms on your device.

In today’s Android tutorial, we are going to tell you how to install custom recovery on android devices but before that let’s find out in detail what is android custom recovery and why you need to install custom recovery android.
Related Android tips and tricks you might like:
What is a Custom Recovery and Why to Install a Custom Recovery on Android?
Custom Recovery is a third party android operating system version. All the android smartphones come with stock recovery installed on them but that recovery is no enough to flash your device with custom roms. After flashing custom recovery on your android device, the stock recovery will be replaced and you will get a custom environment on your android mobile phone. The custom recovery will perform all the things which are done by a stock recovery but you will get additional features.
After installing custom recovery you will be able to install custom rom’s on your android device like Cyanogenmod, Paranoid Android and many more. This will allow you to use the features and interface of other android smartphones. You will also be able to create backup of your entire phone. Flashing custom recovery will also help you in restoring backups which you have created.
Method 1: How to Install Custom Recovery using PC (without Rooting)
Normally, you have to root your device for flashing custom recovery on your device. However, there is also a way to install custom recovery without rooting android device. To install custom recovery without root, you have to follow the steps which we have shared below.
Note: Before we tell you how to install custom recovery without root, you have to make sure that the bootloader of your device is unlocked.
Step (1): Make sure ADB and Fastboot tools are installed on your computer. If you are not having the tools, first of all download and install these tools on your PC.
Step (2): Once the tools are installed, open the location where they are installed. In most of the case, it is installed in C Drive.
Step (3): Now you have to copy the recovery file for your android device in this folder. Make sure that you have renamed the recovery as “recovery.img” before you install custom recovery using PC.
Step (4): Now you have to open command prompt window by pressing Shift Key + right mouse button and then selecting Open Command Window here option.
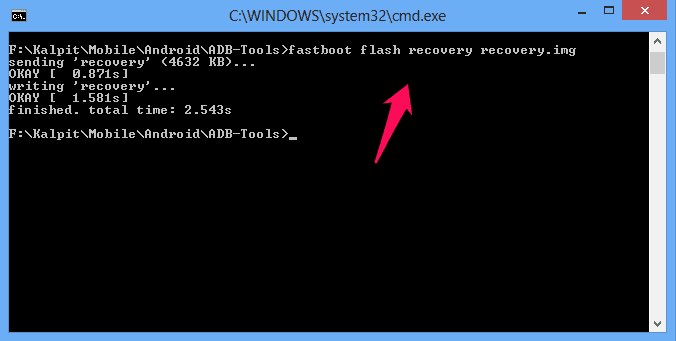
Step (5): Once command window is opened on your computer screen, you have to enter the commands which we have mentioned below one by one:
adb reboot bootloader
fastboot flash recovery recovery.img
fastboot reboot
Once you follow all above steps successfully, Android Custom recovery will be installed on your smartphone.
You may also be interested in checking out:
Method 2: How to install Custom Recovery without PC (Rooting Required)
If your android device is rooted, the process of installing custom recovery will be much easy. In case, your android device is not rooted then you can follow this guide to root Android without using PC. Follow the steps shared below to install custom recovery on rooted android. Here’s how:
Step (1): At first, download Terminal Emulator and install it on your android device. Terminal Emulator for Android allows you to access your Android’s built-in Linux command line shell.
Step (2): Copy the recovery for your android device in the SD card of your mobile phone. Make sure that you have renamed the file as “recovery.img”.
Step (3): Now you have to open Terminal Emulator and execute the commands which we have mentioned below:
su
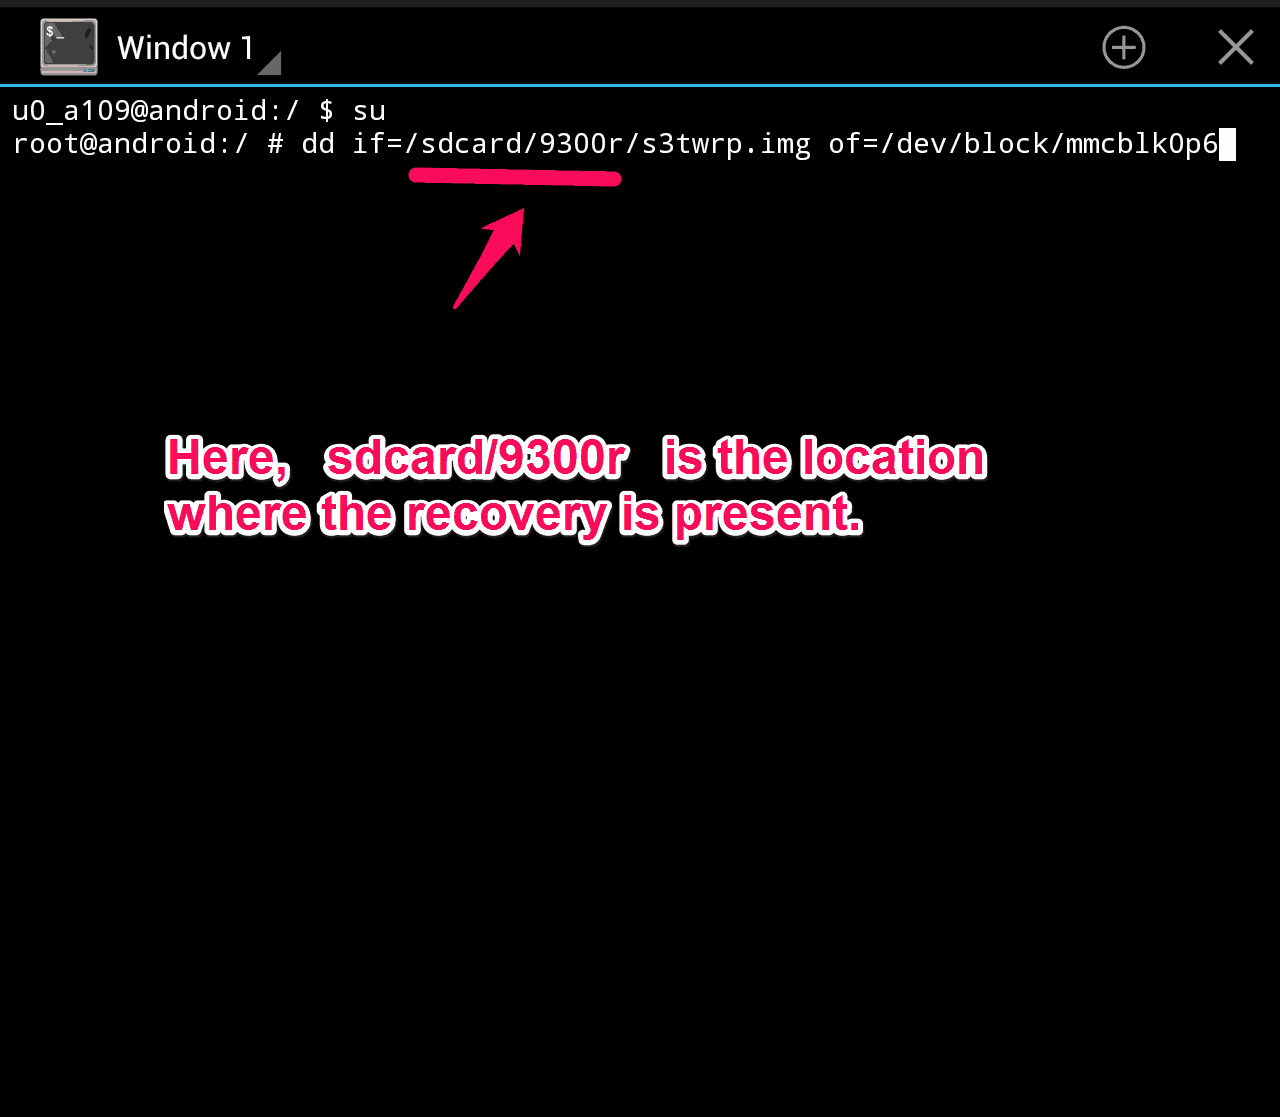
dd if=/path to your recovery.img/recovery.img of=/dev/recovery
Here you have to change the “path to your recovery.img” to the location where the recovery is present in your android device. For the example, a screenshot is shown below:
Step (4): Once the command is executed, you will be able to install custom recovery on rooted android.
Thus, you can see how simple is to install custom recovery on rooted android devices or install custom recovery without root.
Conclusion
Is it easy to install custom recovery on android device using PC as you don’t have to root your device and have to execute only three commands? If you are a newbie to android we suggest following the guide to install custom recovery using PC. Also try to flash TWRP recovery as it is better as compared to CWM recovery. Once you have installed custom recovery by following any of the above two methods you can take full backup and restore backups and also install custom ROM’s on your device.
Feel free to share your view with us via comments and let us know – Which method to install custom recovery on android device works best for you?

