Learn how to create a Windows 10 system image backup without using any third-party software. Simplest method to create a system image backup in Windows 10 PC
In case your entire computer ever stops working, restoring Windows PC from a system image backup is always one of the most appropriate methods. And this is the main reason; almost all Windows users prefer to have a Windows system image backup of their system.
If you want to create a system image backup of Windows 10 you will come across a lot of options. There are various helpful methods which you can follow to create the backup of your entire Windows 10. If you have used Windows 7 operating system and created a system image of the Windows, you will be glad to know that you can create system image backup in Windows 10 operating system too.
Once you have created system image backup Windows 10, you will be able to restore the files which are present on your PC or recover your PC if you are not able to boot. Follow the below-mentioned step by step guide in order to create system image backup in Windows 10 computer.
Related tips you might like »»
- How to Remove Windows 10 User Accounts
- How to Check if My Windows 10 is Genuine or Not?
- Top 3 Methods to Make Windows 10 Start Menu Open Faster
- How to Open Specific Settings Page Directly In Windows 10
- How to Backup Files Using EaseUS System GoBack Free
- How to Create Windows 10 Child Account to Monitor Your Child’s PC Activity
How to Create a Windows 10 System Image Backup
Since the Windows system image backup will take up a lot of hard disk space, so we would suggest you to create Windows 10 system image backup in an external hard disk. So, let’s have a look at the below-given instructions to create a system image backup in Windows 10:
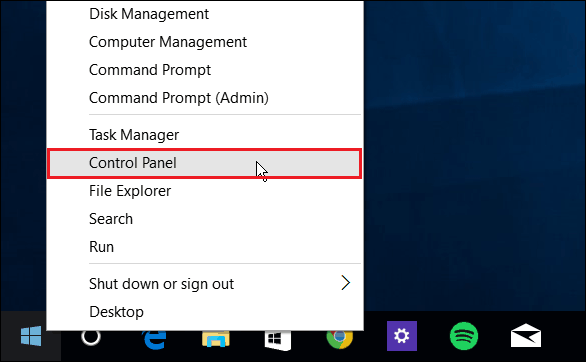
Step (1): First of all, right-click on the Start button to open the hidden Quick Access menu and select the Control Panel option.
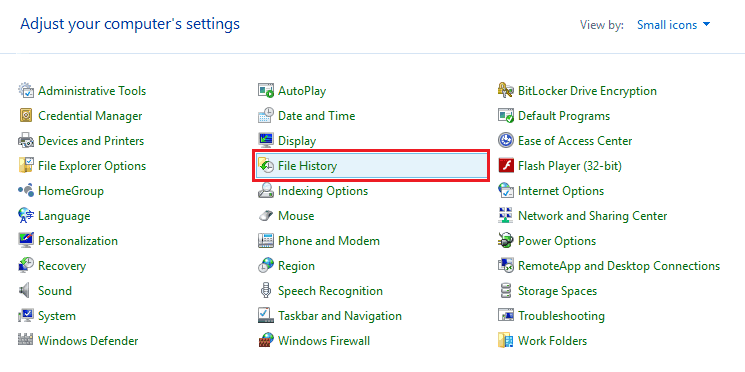
Step (2): Once Control Panel is opened on your Windows 10 PC, now click on File History option.
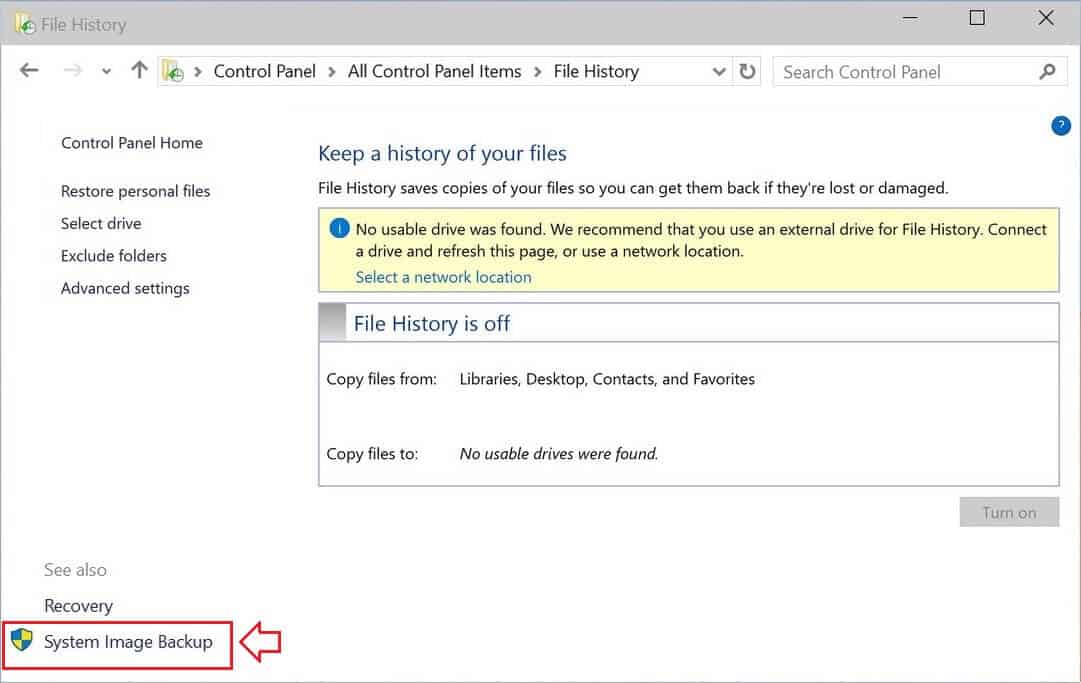
Step (3): From the File History window, click on System Image Backup link which is located at the bottom-left corner of the screen.
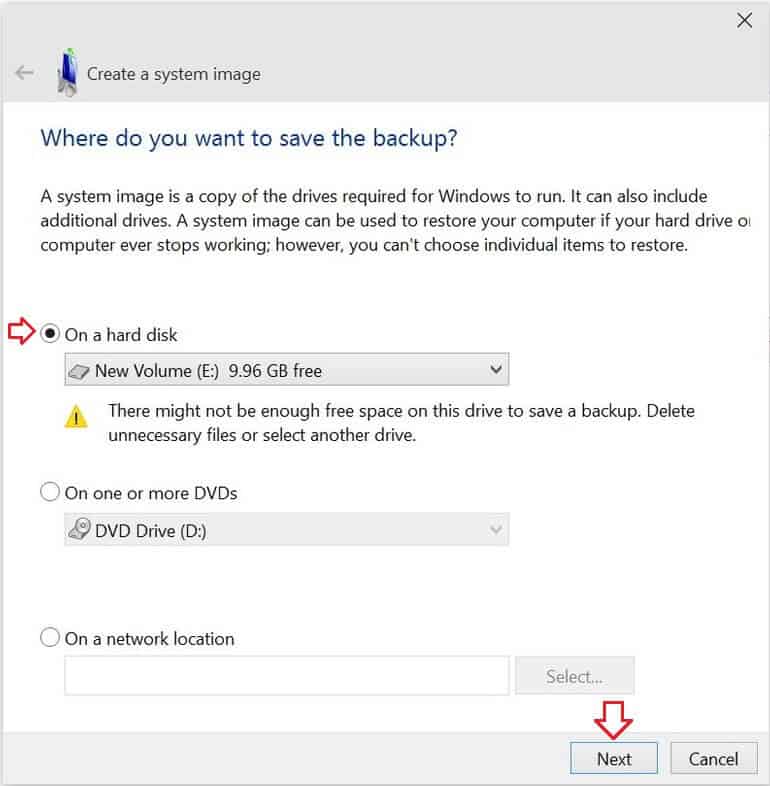
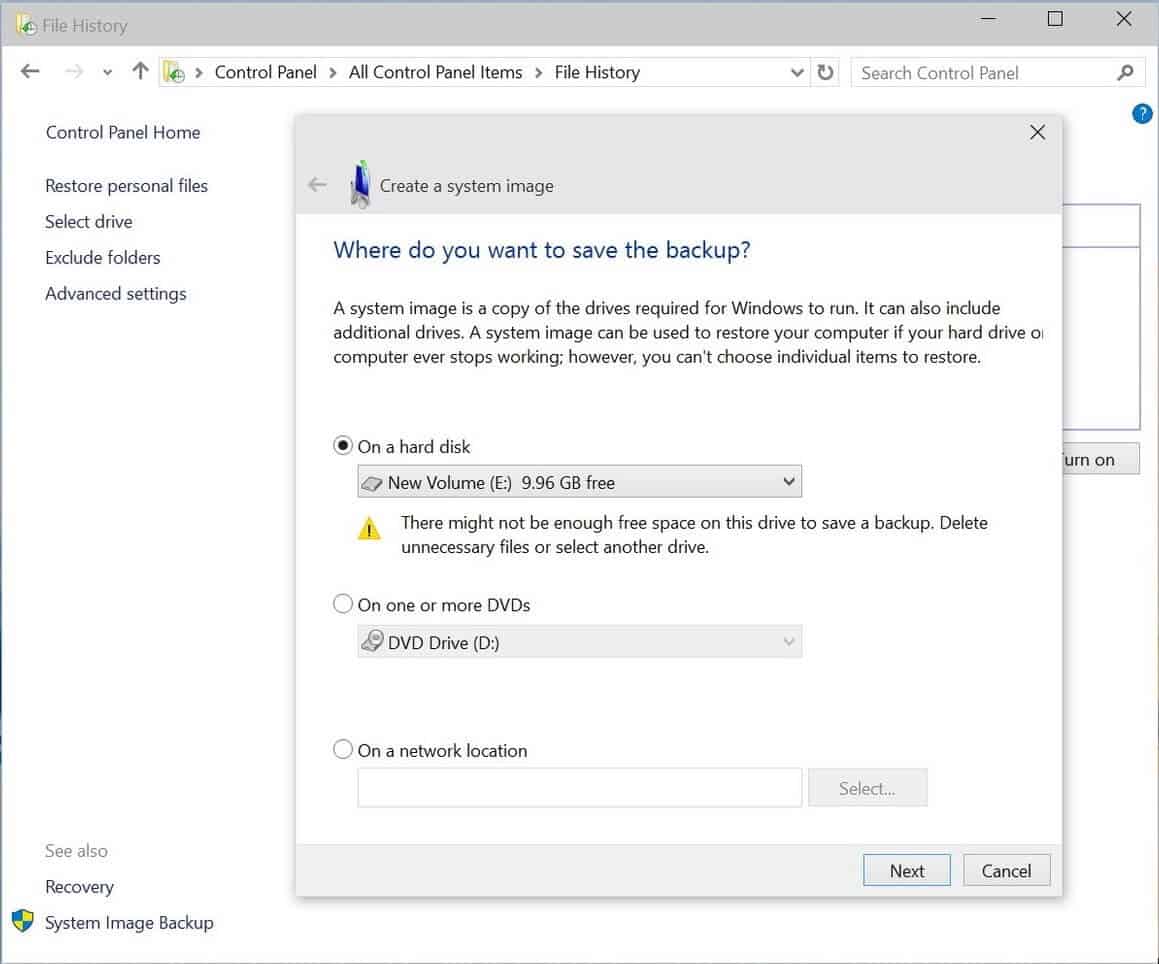
Step (4): Just after the click, The System Image Backup window will appear along with three different options: On a hard disk, On one or more DVDs, and On a network location to create backup.
- If you are going to use a hard disk drive to create windows 10 system image backup then you need to click On a hard disk option and select the hard disk where you are planning to save the backup and then click Next button.
- If you want to save the backup on DVD’s, you need to select On one or more DVDs option and then click Next button.
- And, if you want to save the Windows system image backup to a network location like a NAS or Windows Home Server then select On a network location option and then click Next button.
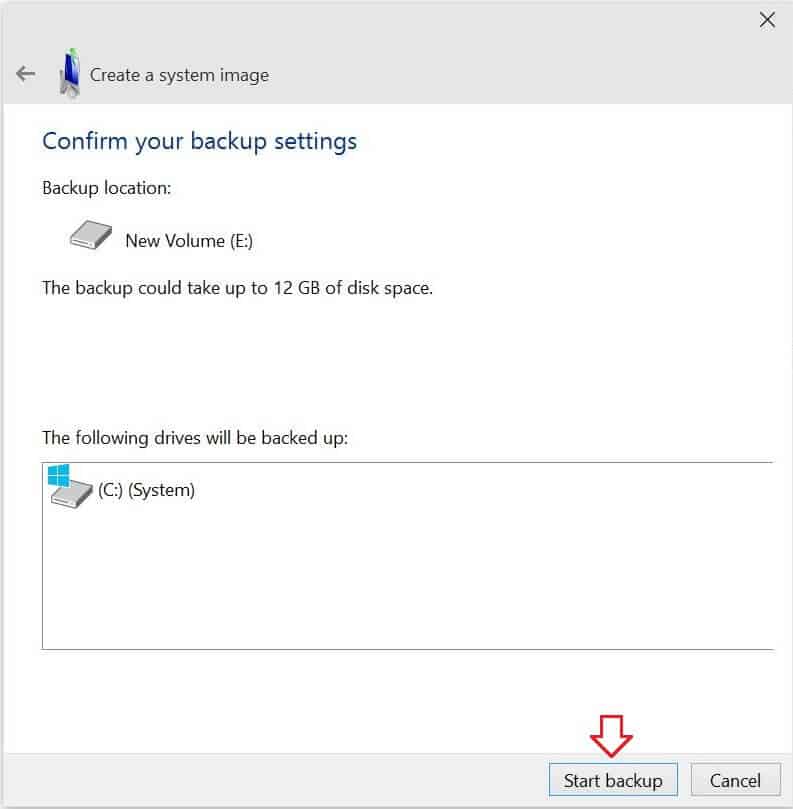
Step (5): Now, you will be asked to confirm. So, simply click on Start backup button to begin the Windows 10 system image backup process.
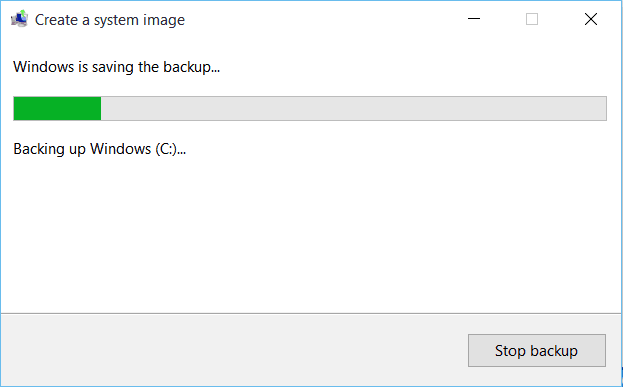
Step (6): You need to keep patience because the Windows system image backup procedure will take time. The amount of time depends on the amount of data you have as well as your system hardware.
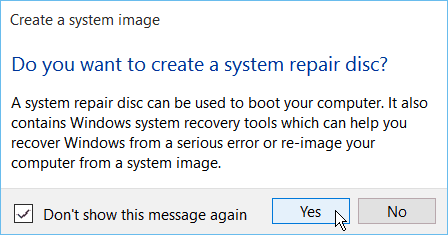
Step (7): Once the Windows 10 system image backup is successfully created, it will offer you the option to create a USB recovery drive. If you haven’t created Windows 10 USB recovery drive yet, definitely you should do it now so you’re prepared to recovery your computer if needed and if you have already done before then simply ignore it.
Step (8): When all the system image backup process has completed, you can now close then “create a system image” window. That’s it!
Thus, you can see how simple is to create Windows 10 system image backup. If you want to find the full system image backup of Windows 10 you just created, you need to open the drive where you saved the backup and then open a folder named “WindowsImagebackup“.
Features of Windows 10 Backup and Recovery tool
The backup and recovery tool is almost available in all versions of Windows. However, the one which you get in Windows 10 comes with many new features. One new feature which you will see in the backup and recovery section of Windows 10 is the Reset this PC. With Reset this PC option, you will be able to restore your current Windows 10. All the files will be kept safe. You also get an option to downgrade to the earlier version of Windows. You can know more about it from here:
The Recovery tool provides many new functions. Startup Repair, System Restore, System Image Recovery and selective startup are some of the new functions which you will find in the recovery section of Windows 10. In order to open all the advanced options on Windows 10, you just have to press Shift key while pressing the Restart button. You can check all the keyboard shortcuts and commands from here:
If you are busy most of the times and forget to create backup from time to time you can take help of the File History option. You can configure this option as it will automatically create a backup of all the important files on a separate disk.
We hope after reading this Windows 10 system image backup creation guide, you are able to create full system image backup on Windows 10 without any interruptions. If you are facing any problems in creating the system image backup Windows 10, clear your doubts using the comments section below.
Please, feel free to share with us – if you have another simplest method to create a system image backup in Windows 10 Computer.
